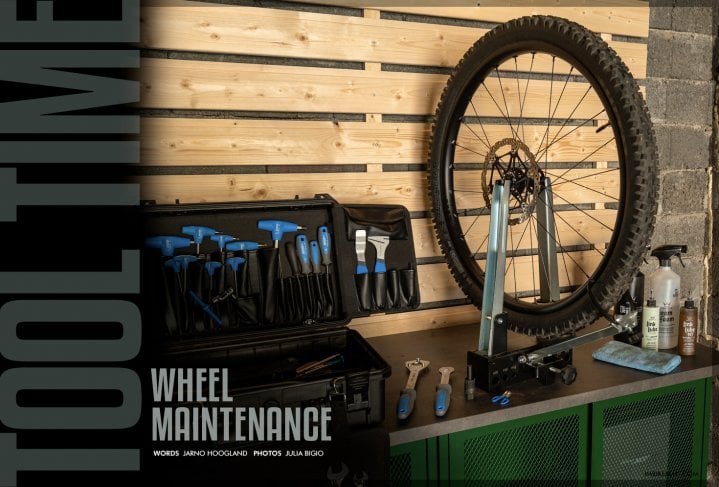
Tool Time - Wheel Maintenance
Issue 70 / Mon 23rd May, 2022
Wheels see a lot of abuse, and with some simple maintenance they last a lot longer.
From all the bits and pieces on your bike, the wheels definitely take a beating. After a few weeks of eating rocks and swallowing roots, it’s time to give them some well deserved love. But where do you start? Which spoke to turn and what part to grease? In this issues Tool Time, we show you the basics of wheel maintenance.
What do we need? Depending on how far you want to take it, it can be done with minimal tools. The basics are the tools you need to remove the wheels from your bike, remove the cassette and a good quality spoke tool. We are lucky enough to be able to use a professional Unior wheel truing stand and although this will of course give you the best possible result, there are also cheaper alternatives available like their pocket truing tool (https://uniortools.com/eng/product/1753-6-pocket-wheel-truing-tool#768117 ) or in the most budget scenario you can even get creative with zip ties to create a makeshift solution.


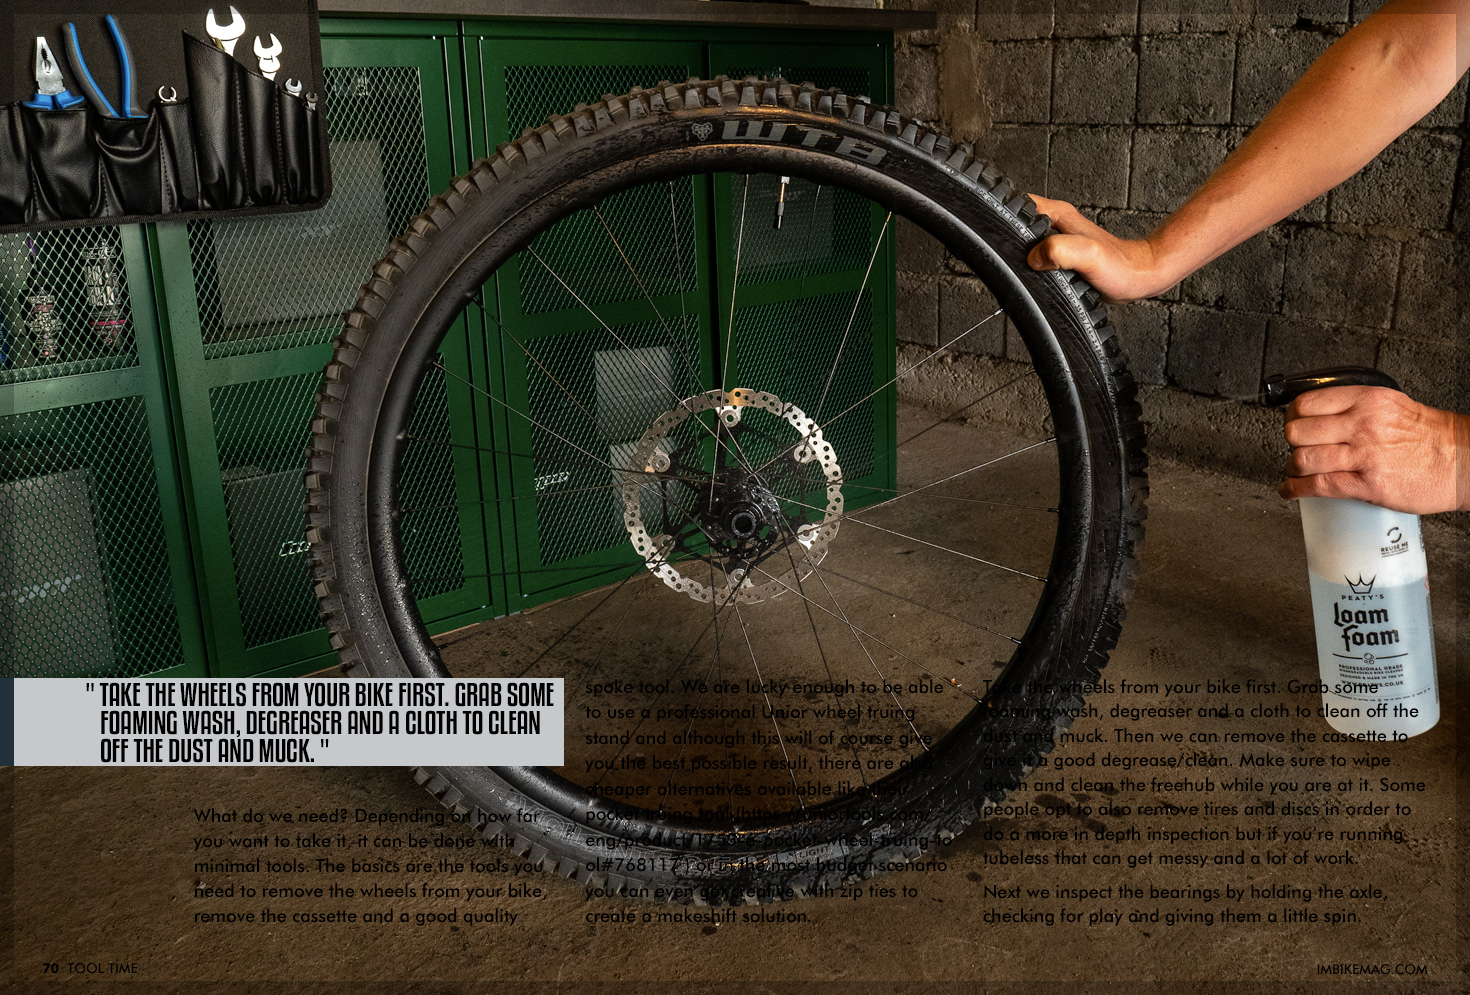
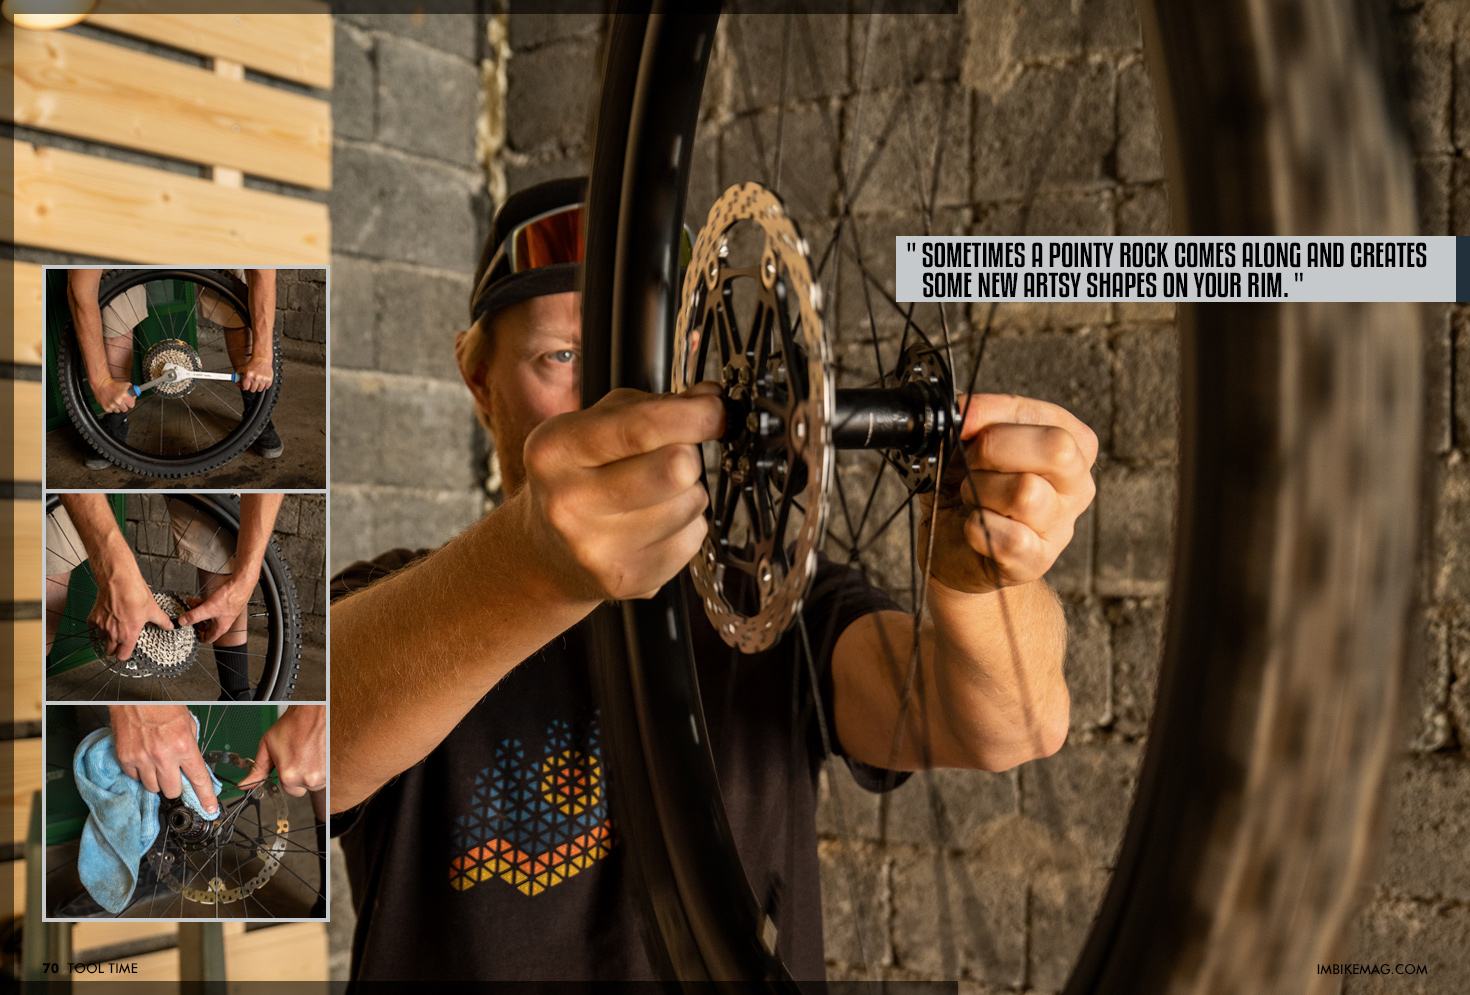
Take the wheels from your bike first. Grab some foaming wash, degreaser and a cloth to clean off the dust and muck. Then we can remove the cassette to give it a good degrease/ clean. Make sure to wipe down and clean the freehub while you are at it. Some people opt to also remove tires and discs in order to do a more in depth inspection but if you’re running tubeless that can get messy and a lot of work.
Next we inspect the bearings by holding the axle, checking for play and giving them a little spin. Any growling noises or feelings indicate your bearings are shot, and it's time to order new ones. To fix this job yourself, you’d most likely need specific bearing extraction and press tools which will turn it all into a more advanced job. So we’ll leave that for another issue.
Best thing to do is take your wheelset to the local bike shop to get the bearings replaced.
If the bearings are running smooth, and there is no play on the freehub you can move onto the next step which is to inspect the rim for dings and cracks. Sometimes a pointy rock comes along and creates some new artsy shapes on your rim.
If you are running alloy rims you can use some adjustable pliers to straighten out the worst, but put a rag between the rim and the pliers to protect your rims for further damage! Never try to do this to your carbon rims!!! This can be a temporary solution, but at some point you will need to replace the entire rim which is not as difficult as it seems. Just very time consuming. That’s for another Tool Time article!

Over time, all the impacts can also create some smaller, hard to see cracks in your rims. Especially around the spoke nipples. So always check for those because if left unnoticed it can lead to your spokes ripping completely out of the rim. Not something you want to happen at mach 1 halfway down a mountain.
If you eventually come across a flat spot on your rim things get tricky. This usually is the result of casing a jump or drop, and is impossible to fix. Rim replacement is the best way in case you run into these types of problems.
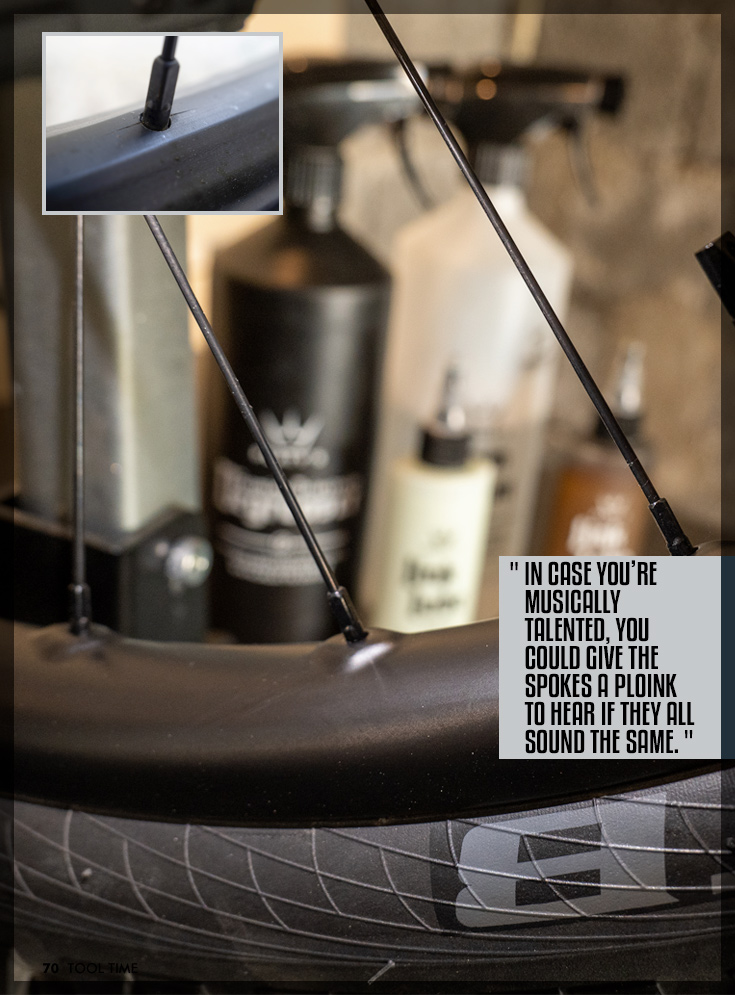
If there’s no cracks, no play and no rotten bearings, you’re almost done! Now you can move on to checking if the spokes have the right tension and the wheels are straight. Ideally, you should use a spoke tension meter for this, because if you’re not measuring you’re guessing. That said, you can also get reasonably accurate by just using your hands and checking if the spokes are all roughly the same tension. If any one of them is loose, tighten it up until it matches the rest of the wheel. In case you’re musically talented, you could give the spokes a ploink to hear if they all sound the same. Note that drive side pokes on the rear and disc side spokes on the front have more tension than the other side.
Once all spokes are roughly the same tension it’s time to check if things are straight. Truing a wheel is sometimes seen as an art, but as with everything: practice makes perfect. The basics are fairly simple to understand, and once you know what you’re trying to do it’s not too difficult to get a half decent result.
The basic idea is that by tightening or loosening the spoke nipples, you create more or less tension on the individual spokes. This allows you to pull the rim to either left or right side, straightening out any wobbles. Tightening the spokes that attach to the left side of the hub, makes the rim move more to the left side, and vice versa.

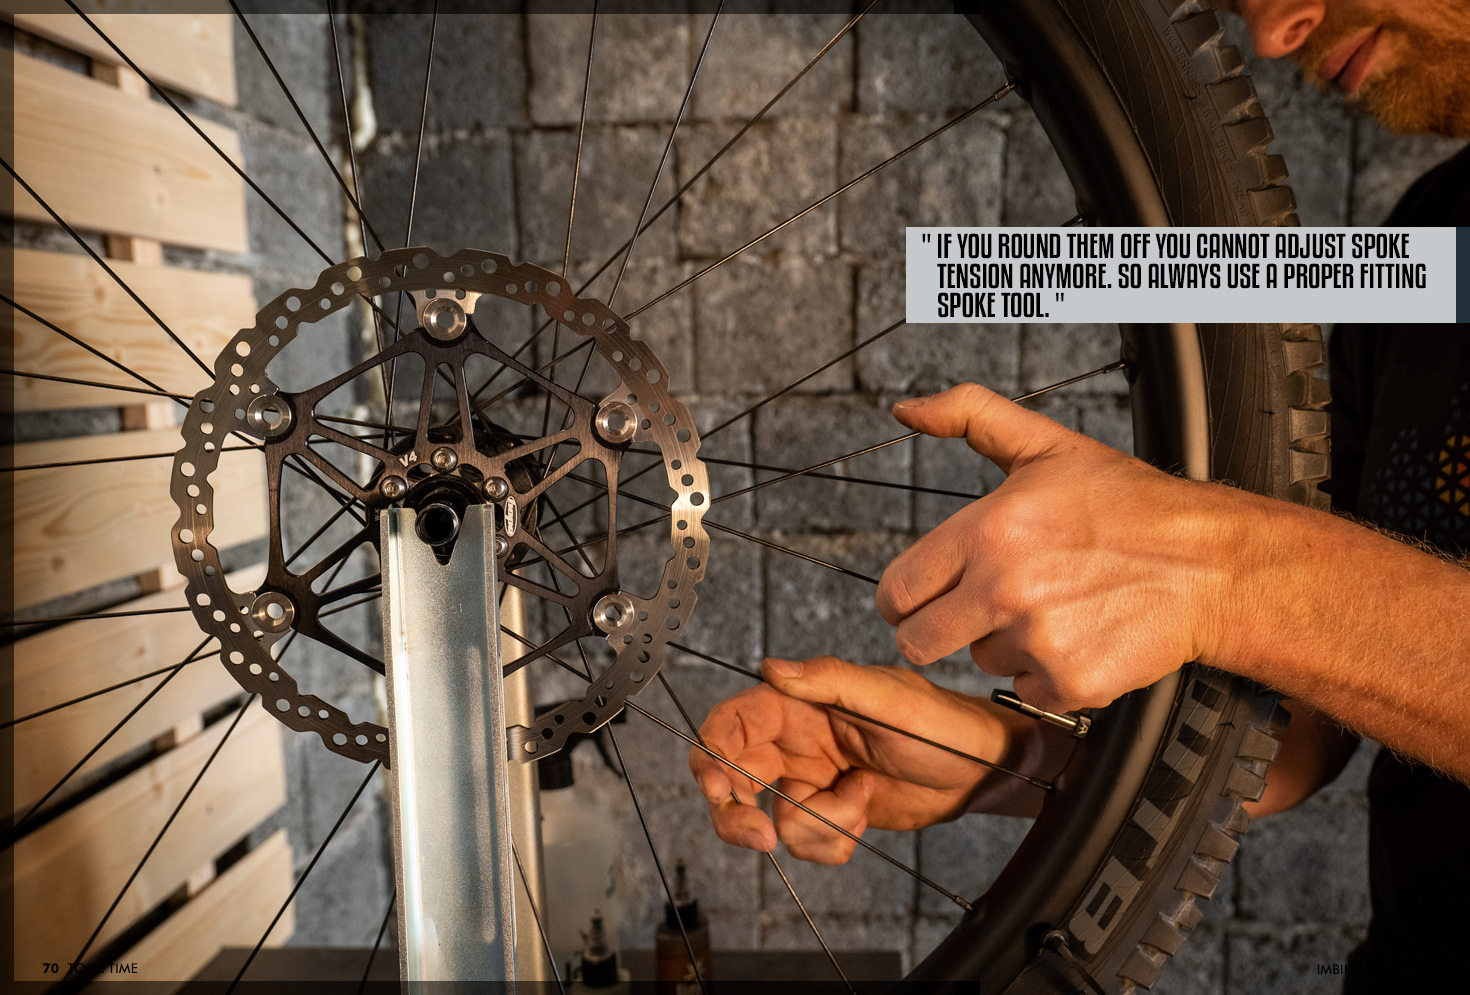
However, key with this is that you cannot unlimitedly tighten the spokes as this will create tension in the wheel itself that will make it easier for the wobble to return. When adjusting, never just adjust one or two spokes. You always work by both loosening and tightening a number of spokes around the section you’re trying to straighten. Be careful when turning the spoke nipples too, because if you round them off you cannot adjust spoke tension anymore. So always use a proper fitting spoke tool.
When starting out with this type of work, do small adjustments only and really take your time. We recommend taking only half turn adjustments of the nippleseach time. Remember clockwise tightens and counterclockwise loosens the spokes.
Get a feeling in your fingers on the spoke tension and how tight you twist the nipple. It should never be forced. Sometimes, nipples can get stuck and you’d need to soak them in a drop of oil before they move. Sometimes they refuse to budge at all and it’s time to take it to the shop or start saving up for some new ones.
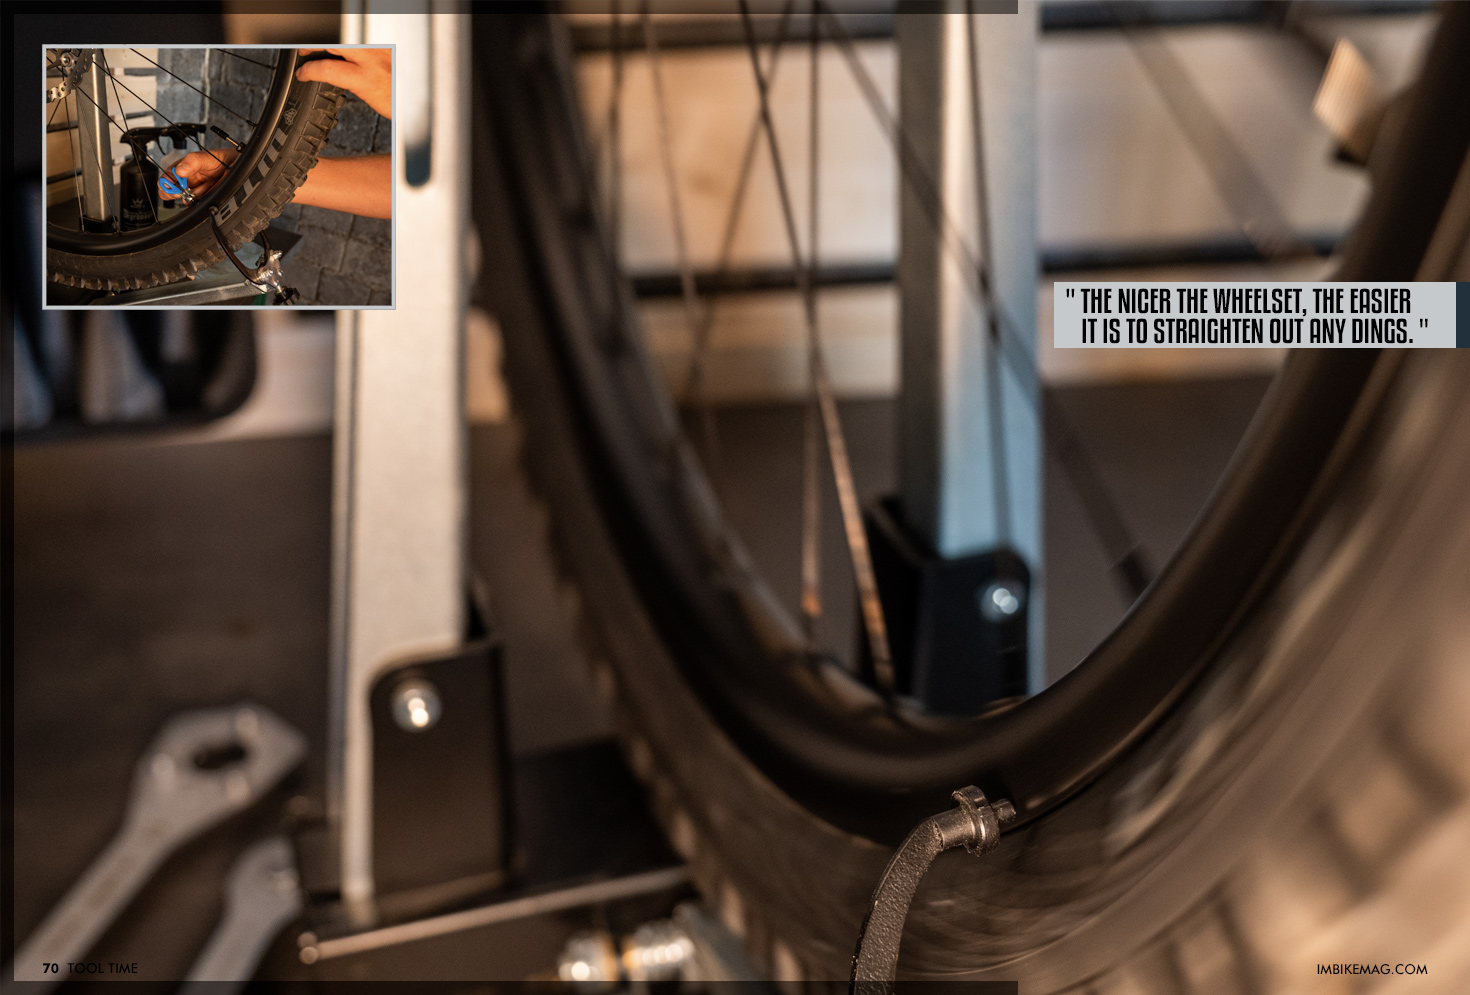
When working with various wheels, you will quickly notice the difference between high and low quality rims. The nicer the wheelset, the easier it is to straighten out any dings. Low quality rims tend to lack stiffness which turns your wheel truing job into a late night affair.
Once you’ve straightened and got the tension evenly divided again, it’s time to remount the discs and cassette. Inspect the tire pressure, remount the wheels on your ride and hit the trails!
By IMB
