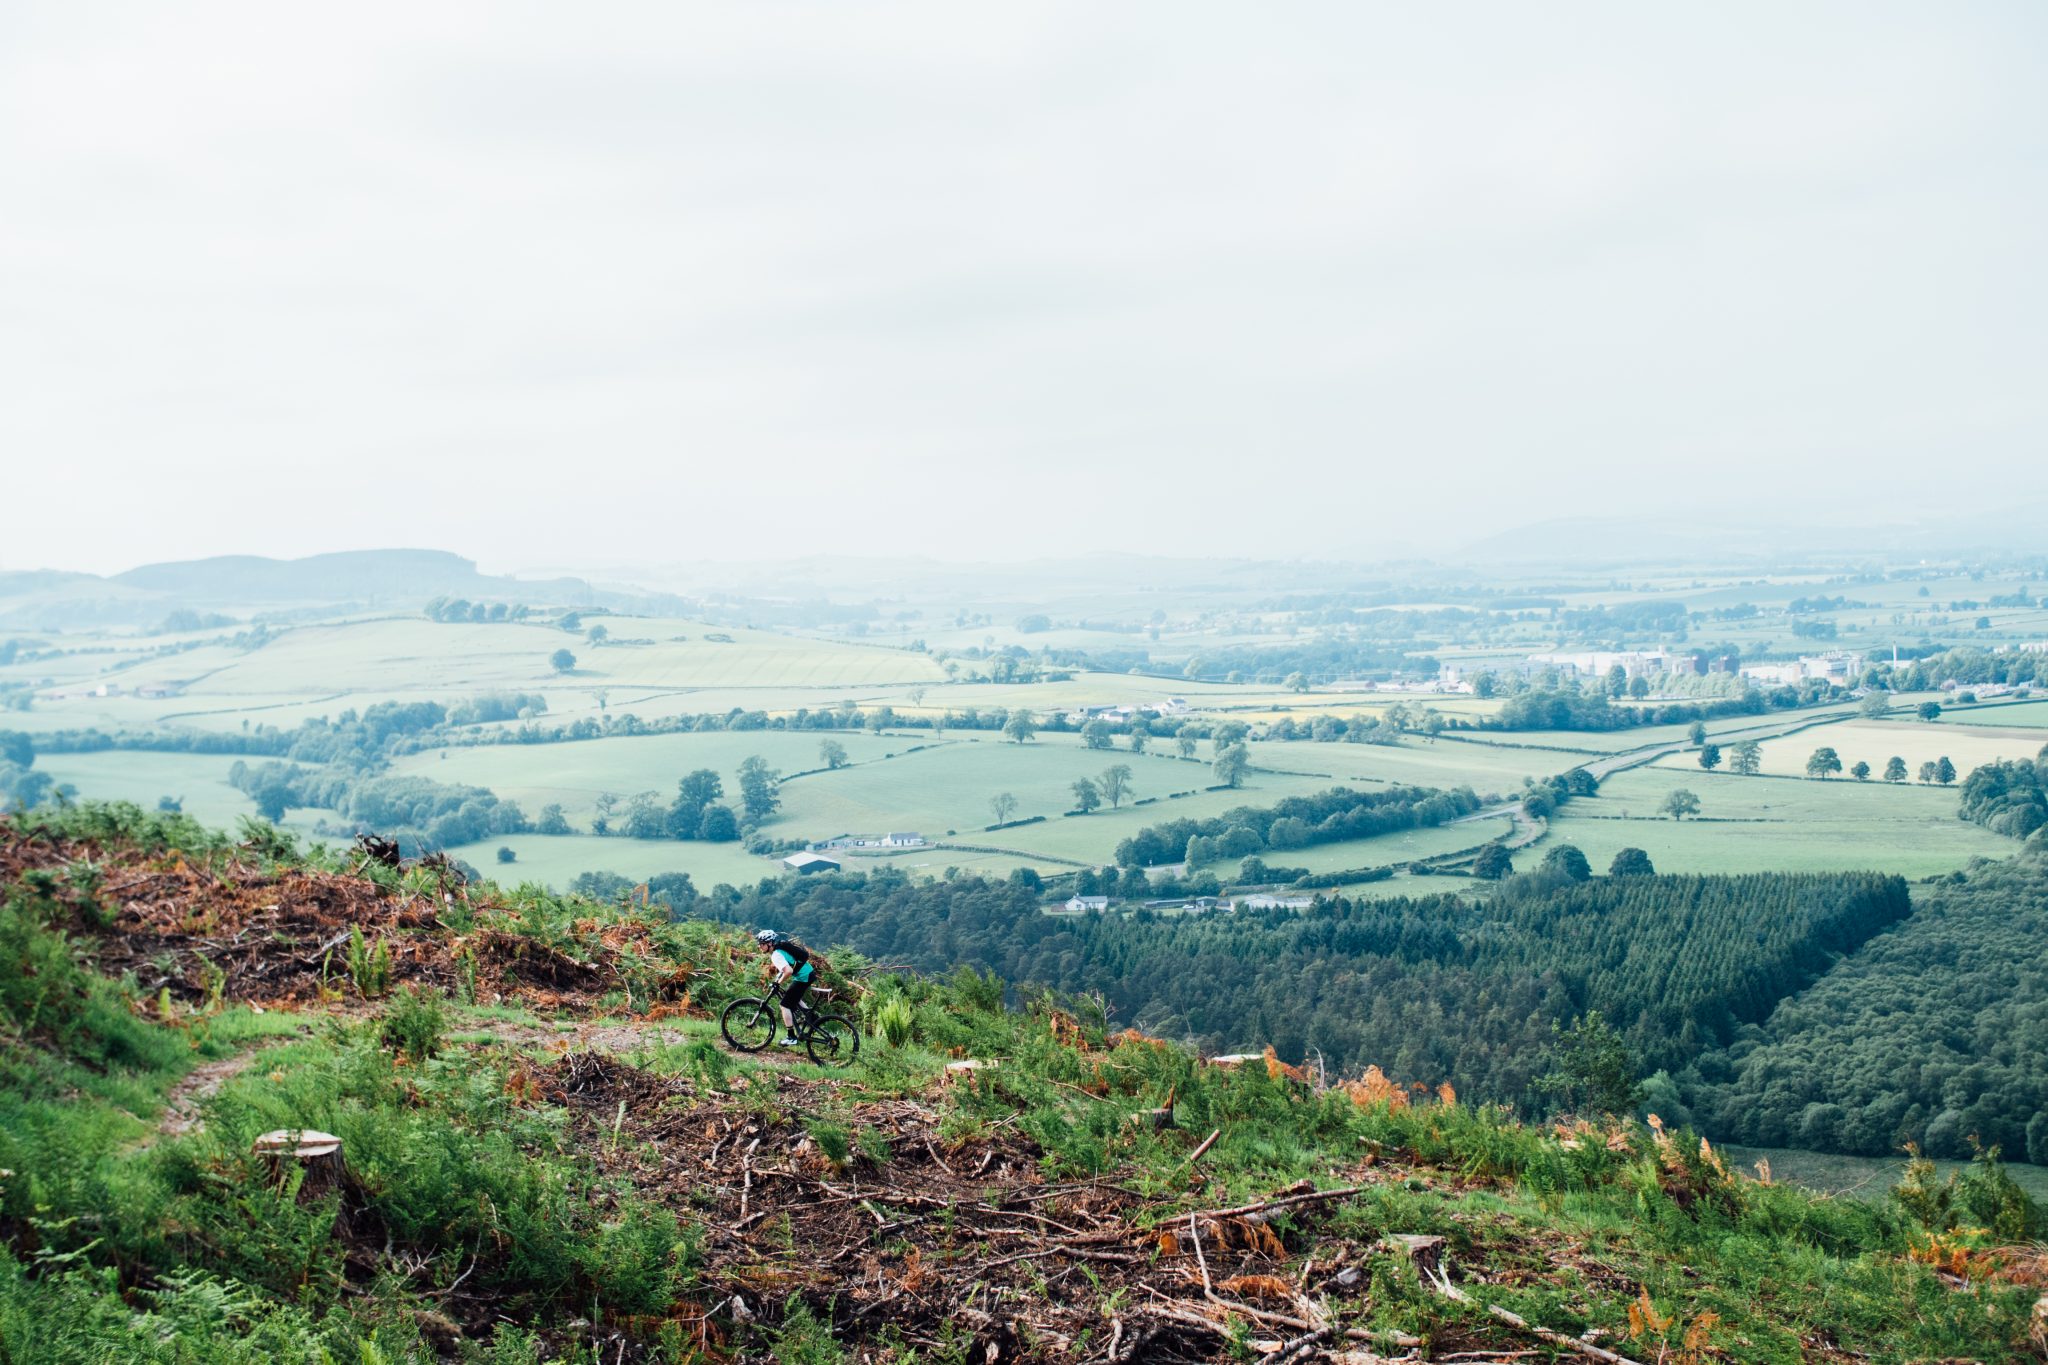
Manual Labour
Technique / Skills

Lifting Without Shifting
Manuals and ‘proper’ manual bunny hops are closely knit companions in your skill arsenal, alongside dropping and jumping they are often considered as the ‘holy grail’ skills. When we look at them performed effortlessly by the likes of Danny (that guy that hops around Edinburgh and Glasgow) MacAskill and other notable mountain bike celebrities it can become all too easy to get disheartened and put these skills out of reach, that needn’t be the case though.
First things first, we will address the manual and put some perspective on the situation that will hopefully elevate your confidence levels and get you doing what is necessary to ride faster, smoother and, of course, safer out on the trails. If you have been following my drivel, then you will already know that the big deal out there on dirt and rock is not to get hung up or stuck on stuff thus stalling out and losing momentum. The dire consequences of such outcomes can mean a trip 'out the front’ which may need following up with a trip to the dentist!


Avoiding that stall out while pedalling was looked at in the last issue, and you can read that here. It’s now time to get the front wheel floating without mechanical assistance (this is probably why its called a ‘manual’, but I’ll be honest and say I’m not 100% sure as to the origins of the naming of this skill/manoeuvre).

On the note of being upfront and open I’ll also confess that through the photo and filming process Daniel Son (aka Dan Wright ace snapper, videographer and trials rider - stagetwoimaging.co.uk) and I further analysed this skill and concluded that there are two distinctive techniques/styles of manual. Previously this skill has been looked at as one and the same but as we are about to discover the method and outcomes differ enough for a new sub-classification of manual.
Enter the ‘Trail Manual’ (TM) and the ‘Street Manual’ (SM)
As a trail rider who has played with trials and street trials (way before the term street trials was invented), dabbling with riding skate parks on BMX and doing flatland tricks I’d subconsciously picked up the two techniques and discovered that I will switch between styles on the trail depending on the situation at hand and desired outcome. Until now I’d do this with no realisation that this was happening. Let me give you these two examples, and we can start to break down the skill and the two different techniques, looking at not only how to do them but better understanding where on the trail they become relevant.
Below you will find some situations to give you a mental picture; I hasten to add that these are not exact numbers.

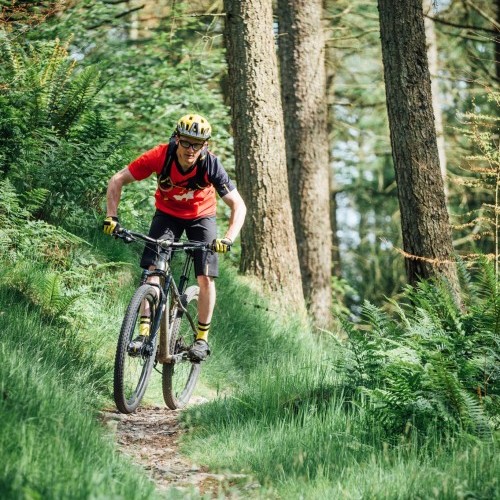
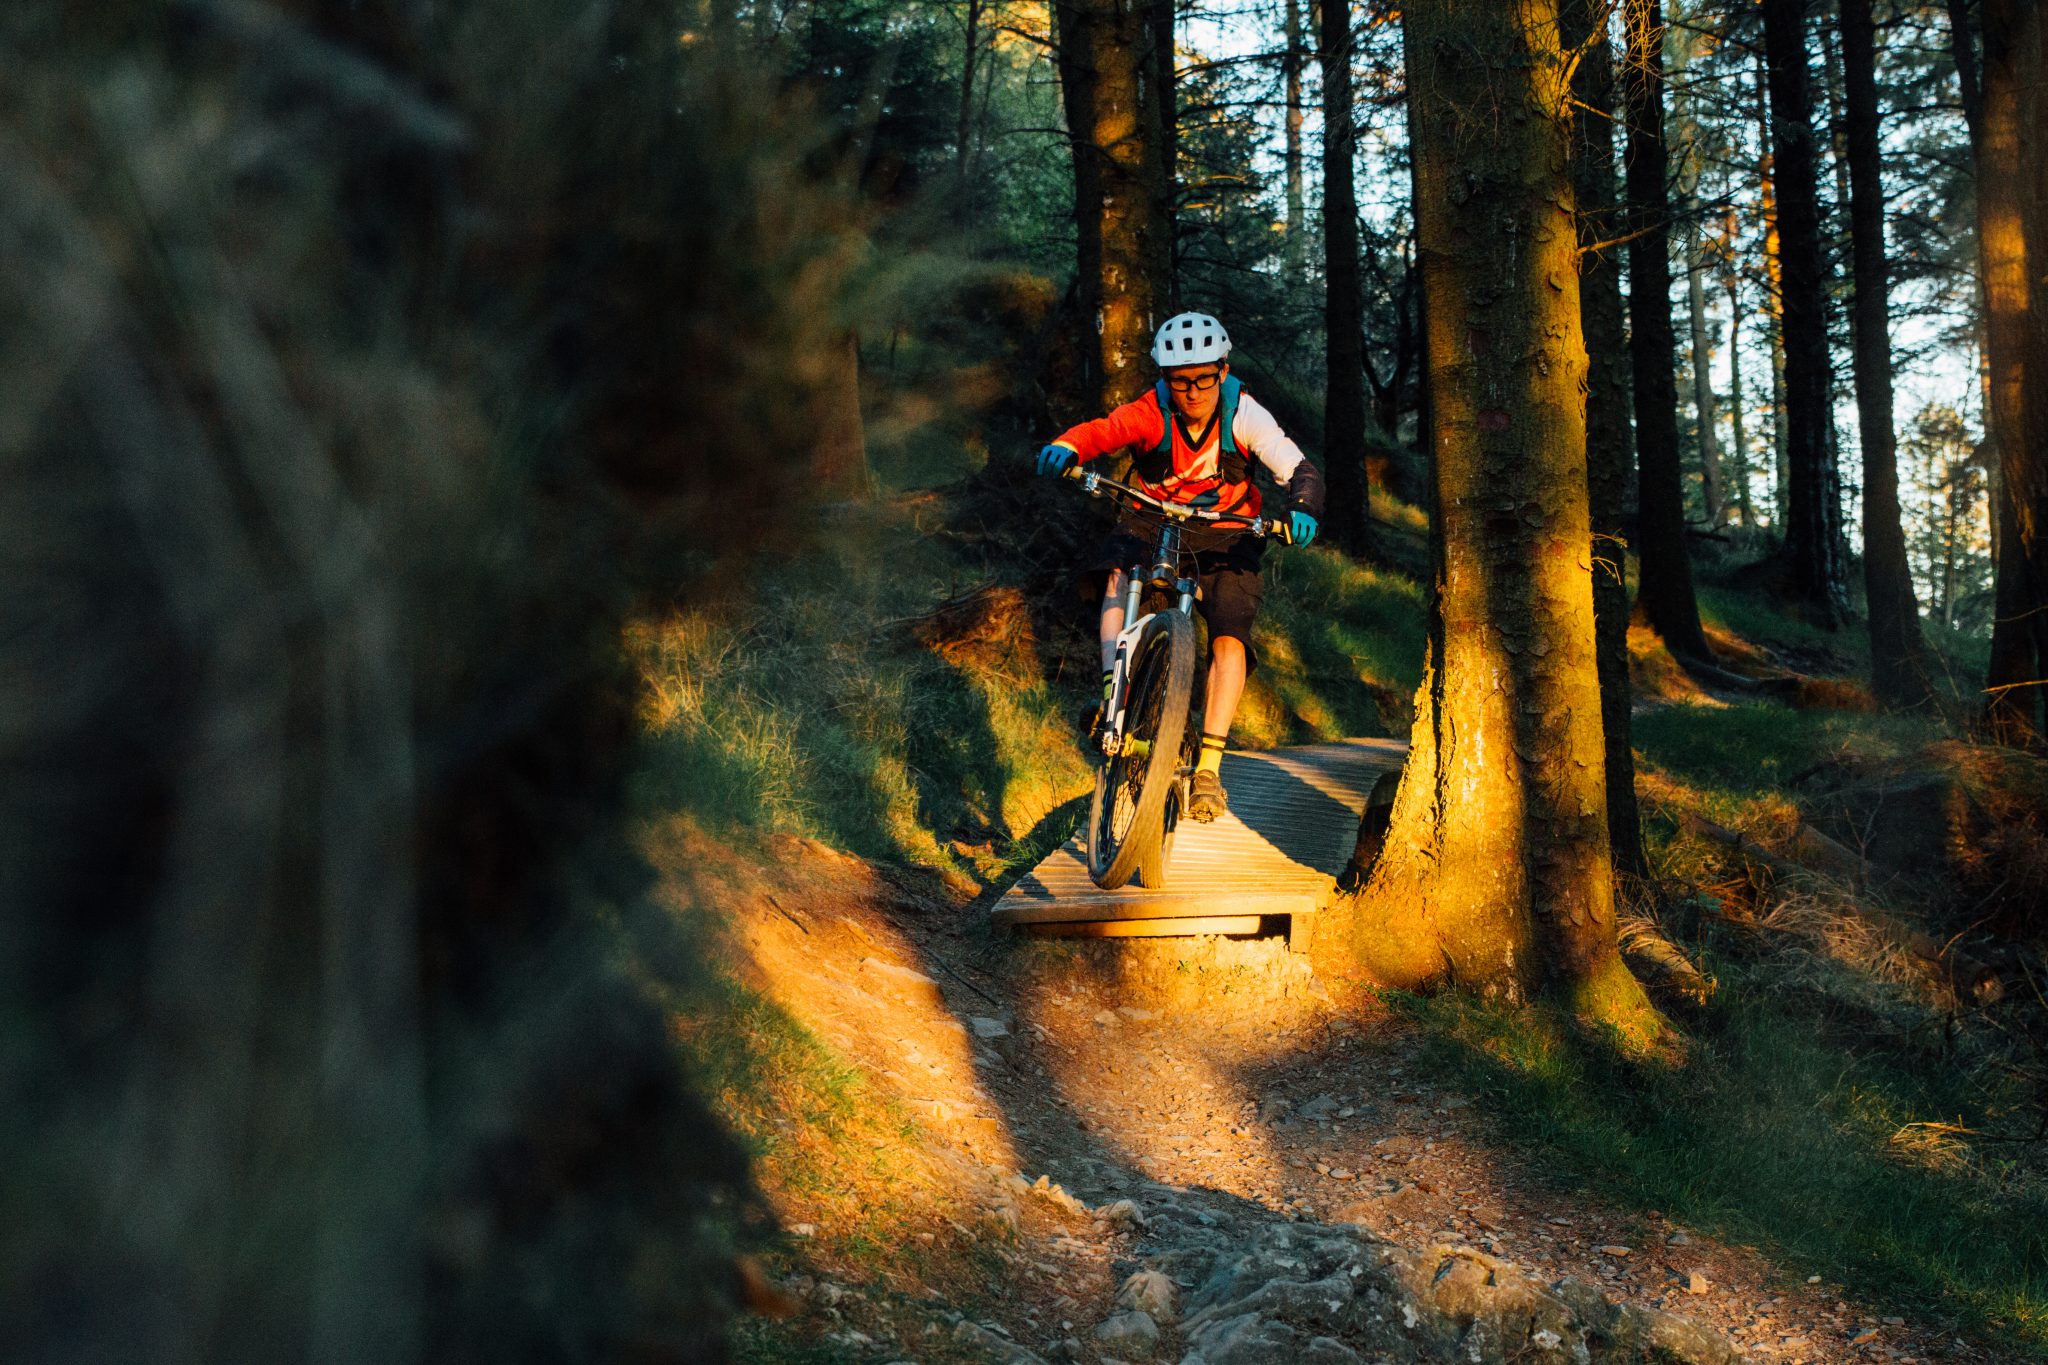
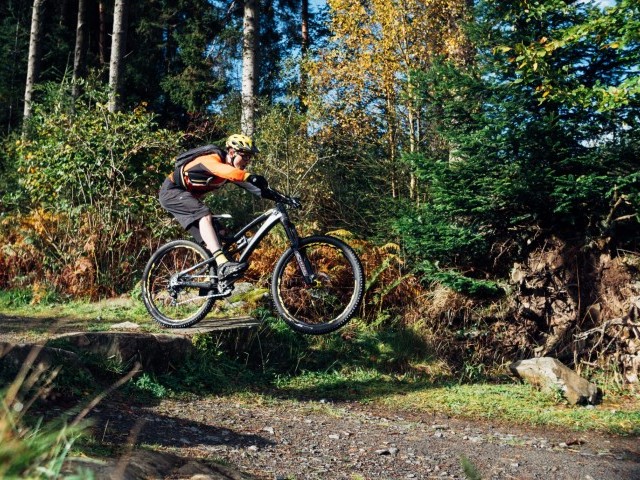
OK, so first up from the 80’s here comes the old ‘Trail Manual’.
- Terrain: Mountains, rock gnar
- Feature: Small water bar running across the trail
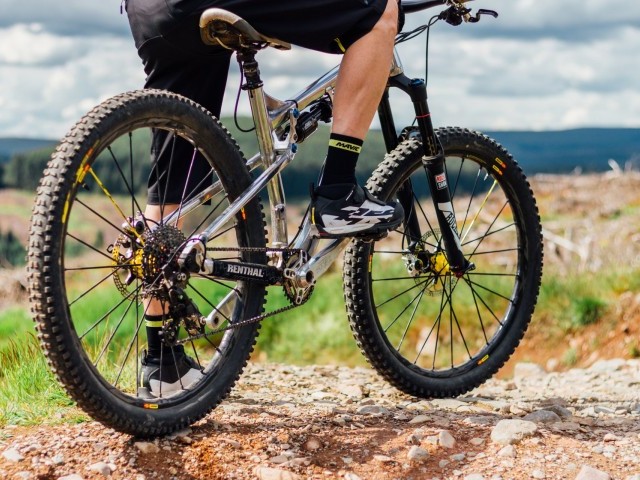
- Required height of lift: Minimal (4 inch - 10cm) think shortest distance between two points is most efficient and smooth arcs prevent further impacting and stalling
- The distance needed for the front wheel to clear water bar: 12 inches (30cm)
- The speed required to maintain lift for said distance: Walking to jogging pace (any faster and we need to hop as the rear wheel will crash into the water bar)
Looking at the above we can see it is no distance to travel and no height to be achieved from our manual lift. If we are at the lower end of that speed range and if the terrain is steep with the front wheel below the back then a little more oomph or effort/technique is going to be required to sustain the lift than if we are rolling a little faster. These small manuals are very snappy and dynamic, often the lumps or bumps in the trail can be used to ‘bonk’ off helping you cheat the lift.
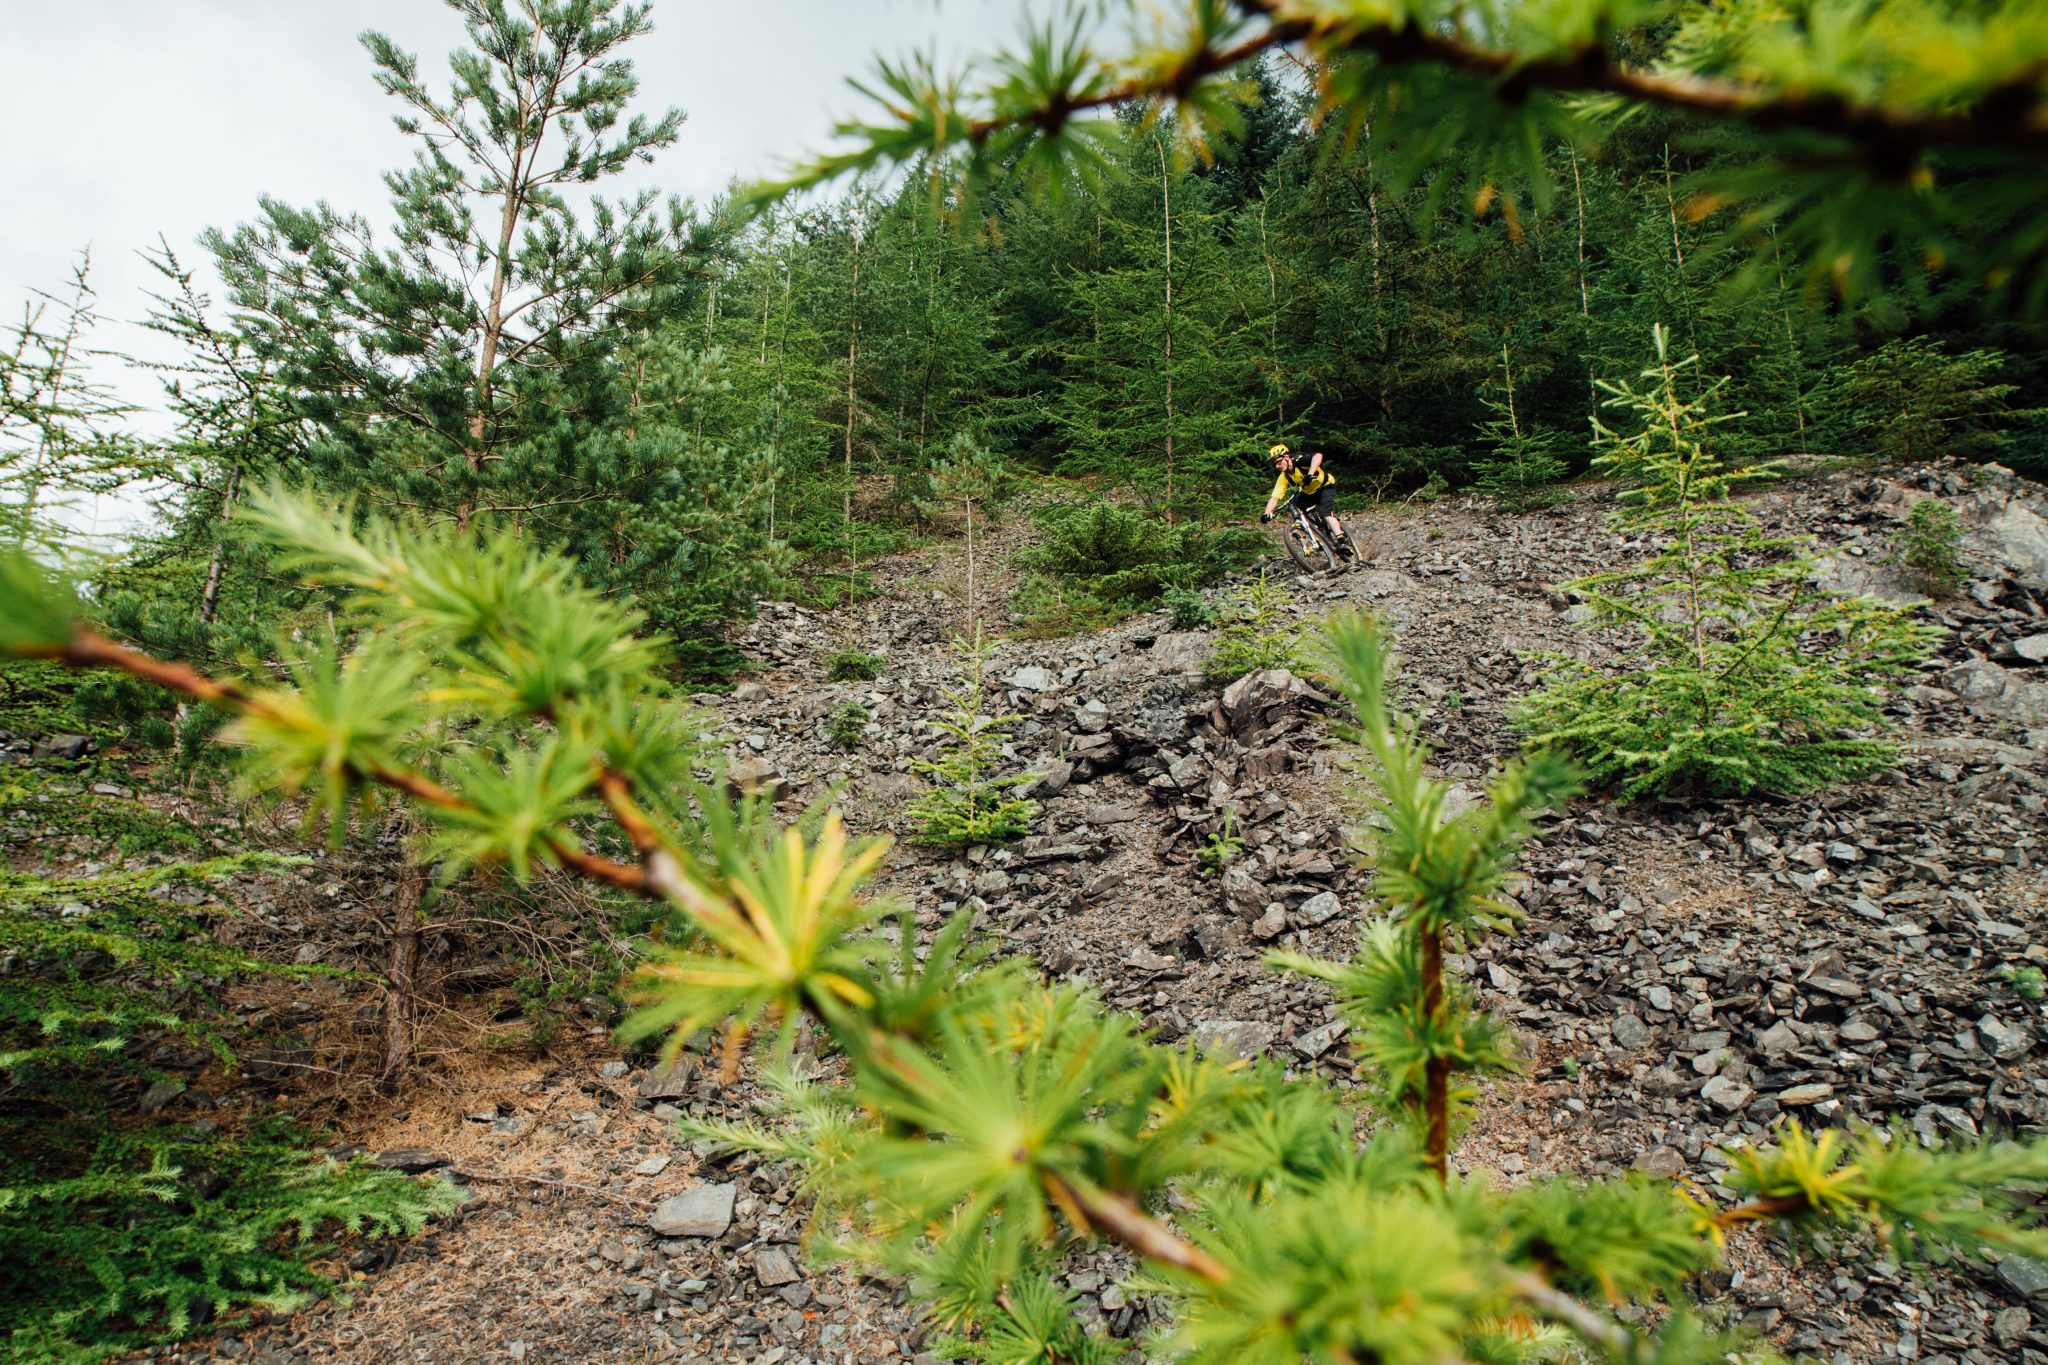
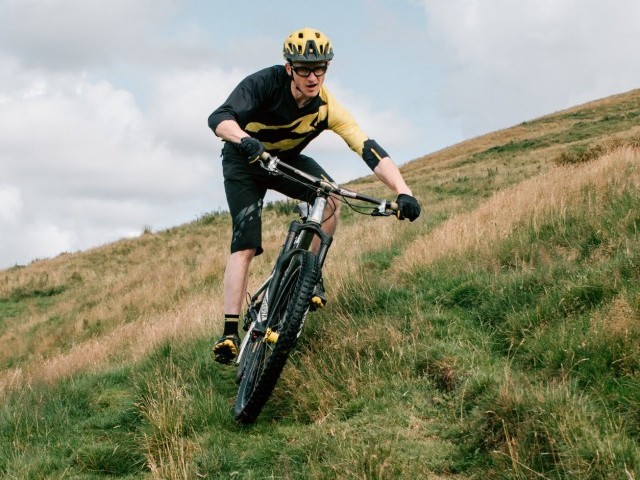
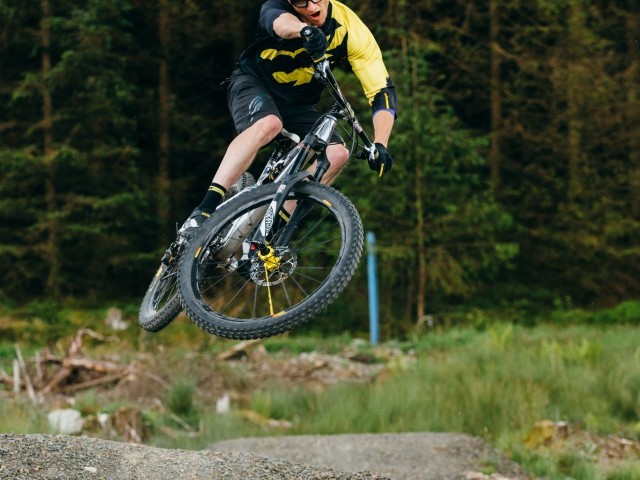
The newly named millennial’s ‘Street Manual’.
- Terrain: Trail centre/bike park built trails
- Feature: Pump bumps
- Required height of lift: Medium to maximum, enough to allow the front wheel to clear the peak of the second bump (lower edge to upper edge of the balance point while between pump bump one and two) 12 inches (30cm) to 24 inches (60cm)
- Required distance for the front wheel to drop into the back slope of next pump bump: 7 feet (2m)
- The speed required to maintain lift for said distance: Jogging to running pace
With smooth rolling terrain under the wheel and lift being generated from the first pump bump the manual shape of the front wheel in air and rear on the trail is done for us, little resistance from hits to the rear wheel allow us to keep that sustained lift with ease. The posture will differ significantly compared to the water bar above, and the legs need to work hard to absorb that first bump and then to press down to keep the back wheel on the trail.
Let’s take out the first pump bump now and use the Street Manual to eliminate some stalling and slowing (or being pushed up into the air) by performing a Street Manual into the pump bump; the difference now is we have no sizeable undulation in the terrain to cheat the lift for us. The rider has to generate the higher and more sustained lift ‘off the flat’. The same as a rider in a flatland BMX environment. This SM style is not just ‘cool’ to feel and do it does have a bonafide use and place for mountain biking. However, I will point out that there are still ways through the same shapes described above without the need to do an SM.

Let's look at another example where the SM is the ultimate ‘get out of jail free’ card and only technique that will enable you to carry speed and maintain control.
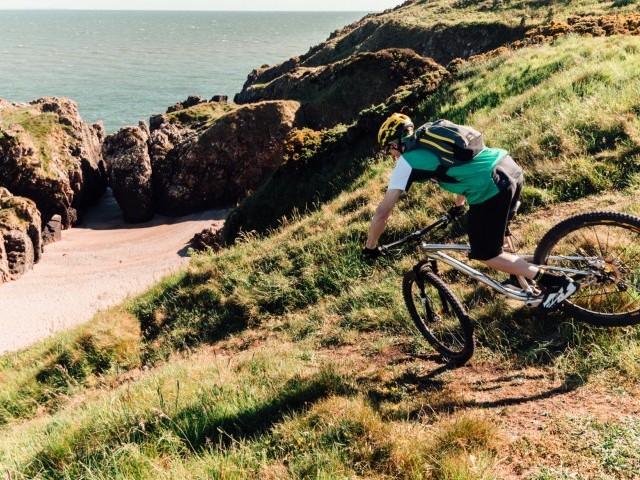
- Terrain: Natural, eroded ground
- Feature: hole, low point with enough depth and sizeable edge to the far side that the front wheel will stall out significantly upon impact
- Required height of lift: Medium to maximum (lower edge to upper edge of the balance point) 12 inches (30cm) to 24 inches (60cm). This will also be dependant on the depth of the hole. We need to float the front wheel over in a shallow arc so as to land on the top of the far side; the back wheel is going to drop into this hole
- Required distance for the front wheel to clear low point/hole: 60 inches (150cm)
- The speed required to maintain lift for said distance: Jogging to running pace
- Speed rider is travelling = higher than prescribed above
Ok so this is a ‘crux’ situation, we can’t just brace and plough through this, the hole is going to suck you in, stall the bike and spit you out. We need to get that front wheel over this one but the snappy dynamic lift of a TM is not quite enough (especially at the lower end of the speed spectrum) to get the distance, we need to sustain to the lift, and this comes from that SM stretched style. We link the two techniques through the grey scale by starting with a snappy TM take off (we are moving fast so trail meters per second covered is high) and then bring in our SM stretched style to deal with the scale, width across and depth.
Ultimately when it’s getting rough and technical, we can benefit from knowing and utilising both styles. With the SM style and application, there is much more going on with the hips and legs, the back wheel tracks the ground and as the upwards facing shapes try to bump and push that rear wheel airborne, so the legs work to bring the bike up into the body. Anytime the rear wheel may float/become light from the ground fading/dropping away below the legs drive the rear wheel down to maintain contact, the plus here is the ‘pump’ gives you extra drive propelling the bike forward, pumping SM style.
It’s horses for courses, don’t become despondent thinking that to ride trail well you need to don skinny jeans and sit the bike up on its back wheel for meters at a time. Most situations where you are ‘at risk’ of an over the bars (OTB) or are loosing speed and ground to your washed up ex-racer buddies (points finger to self while typing here) by crashing through a multitude of mini stall points (fractions add up to become BIG chunks) you simply require fast snappy dynamic TM’s to keep on their wheel.
Just writing this gives me another light bulb moment of how better to understand and look at these two styles, think fast twitch muscle response and slow twitch response. TM’s are fast for sure, and the longer more laboured style of the SM is a slower action.
We should also take into account the bike and its geometry/set up. Shorter bikes with higher front ends (and shorter stems) lend themselves to making these shapes far better than the traditional cross country race bike. Bikes with longer top tubes and stem combos where the bars are lower down are hard work to manual. So if you get a chance, jump on some other bikes and have a play. No matter what you do there will be compromises and accepting or rejecting trade-offs is all part of the craft.
Stop waffling and tell us how it’s done.
Let’s get to the key point and another confession. I found that through the years of analysing and breaking all this stuff down the manual is in that category of ‘hardest to define’ and when watching riders try to grasp this has been one of the toughest to get the desired outcome. Fortunately for you, I’m relentless and rigorous in my pursuit and always welcome debate and questioning, I’m happy to admit I’m wrong and love adapting and growing the knowledge to share after all this is a science and should be treated as such.
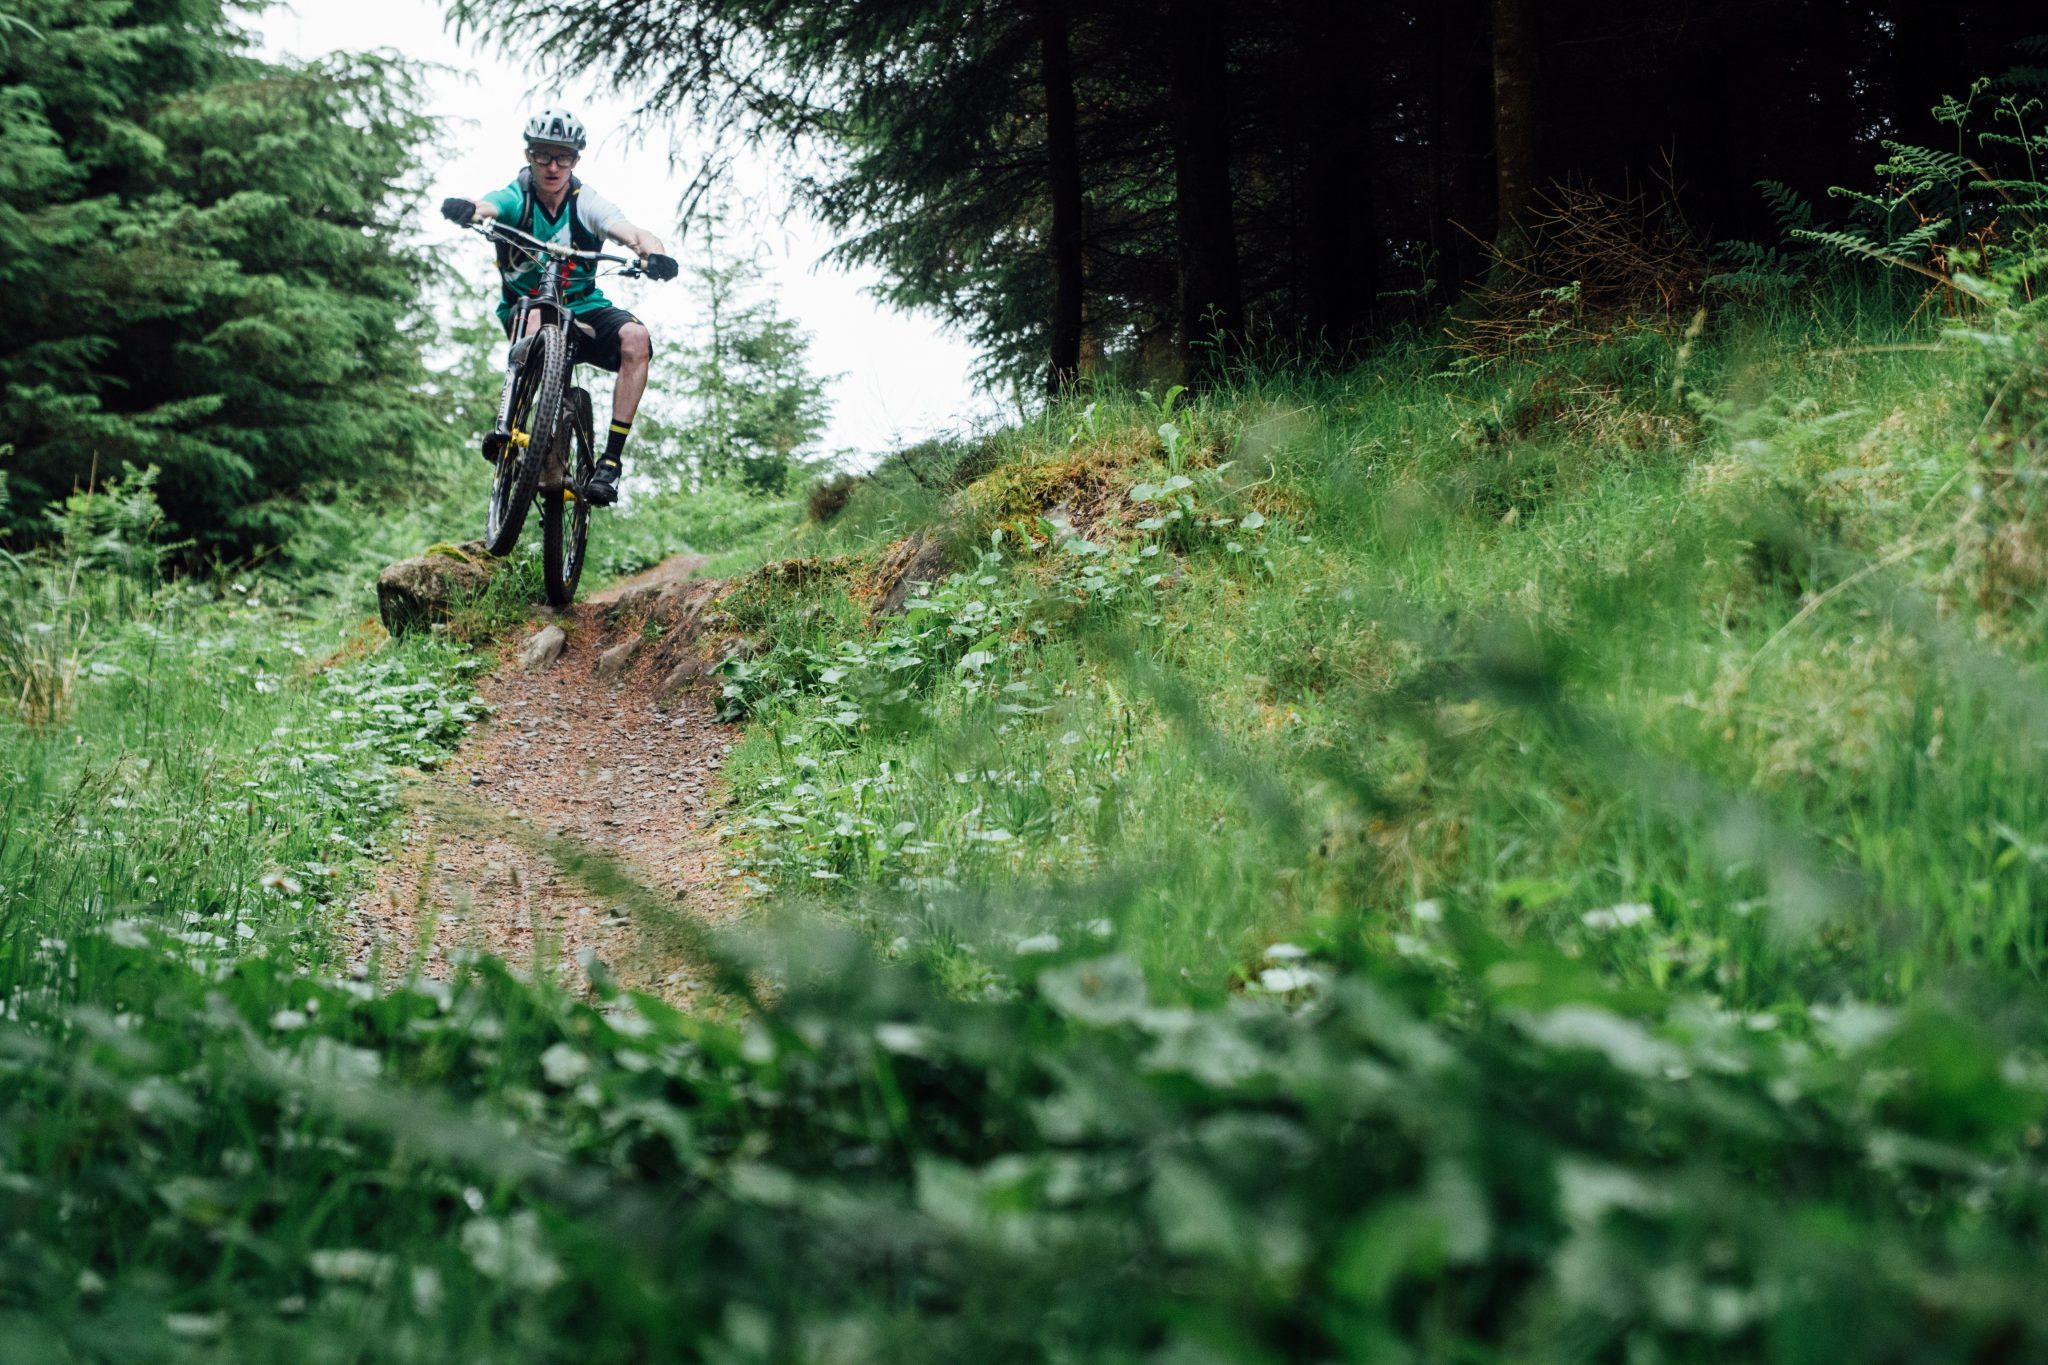
Trail Manuals are better derived from Street Manuals - start slow and build up pace in both the bike and your muscular response.
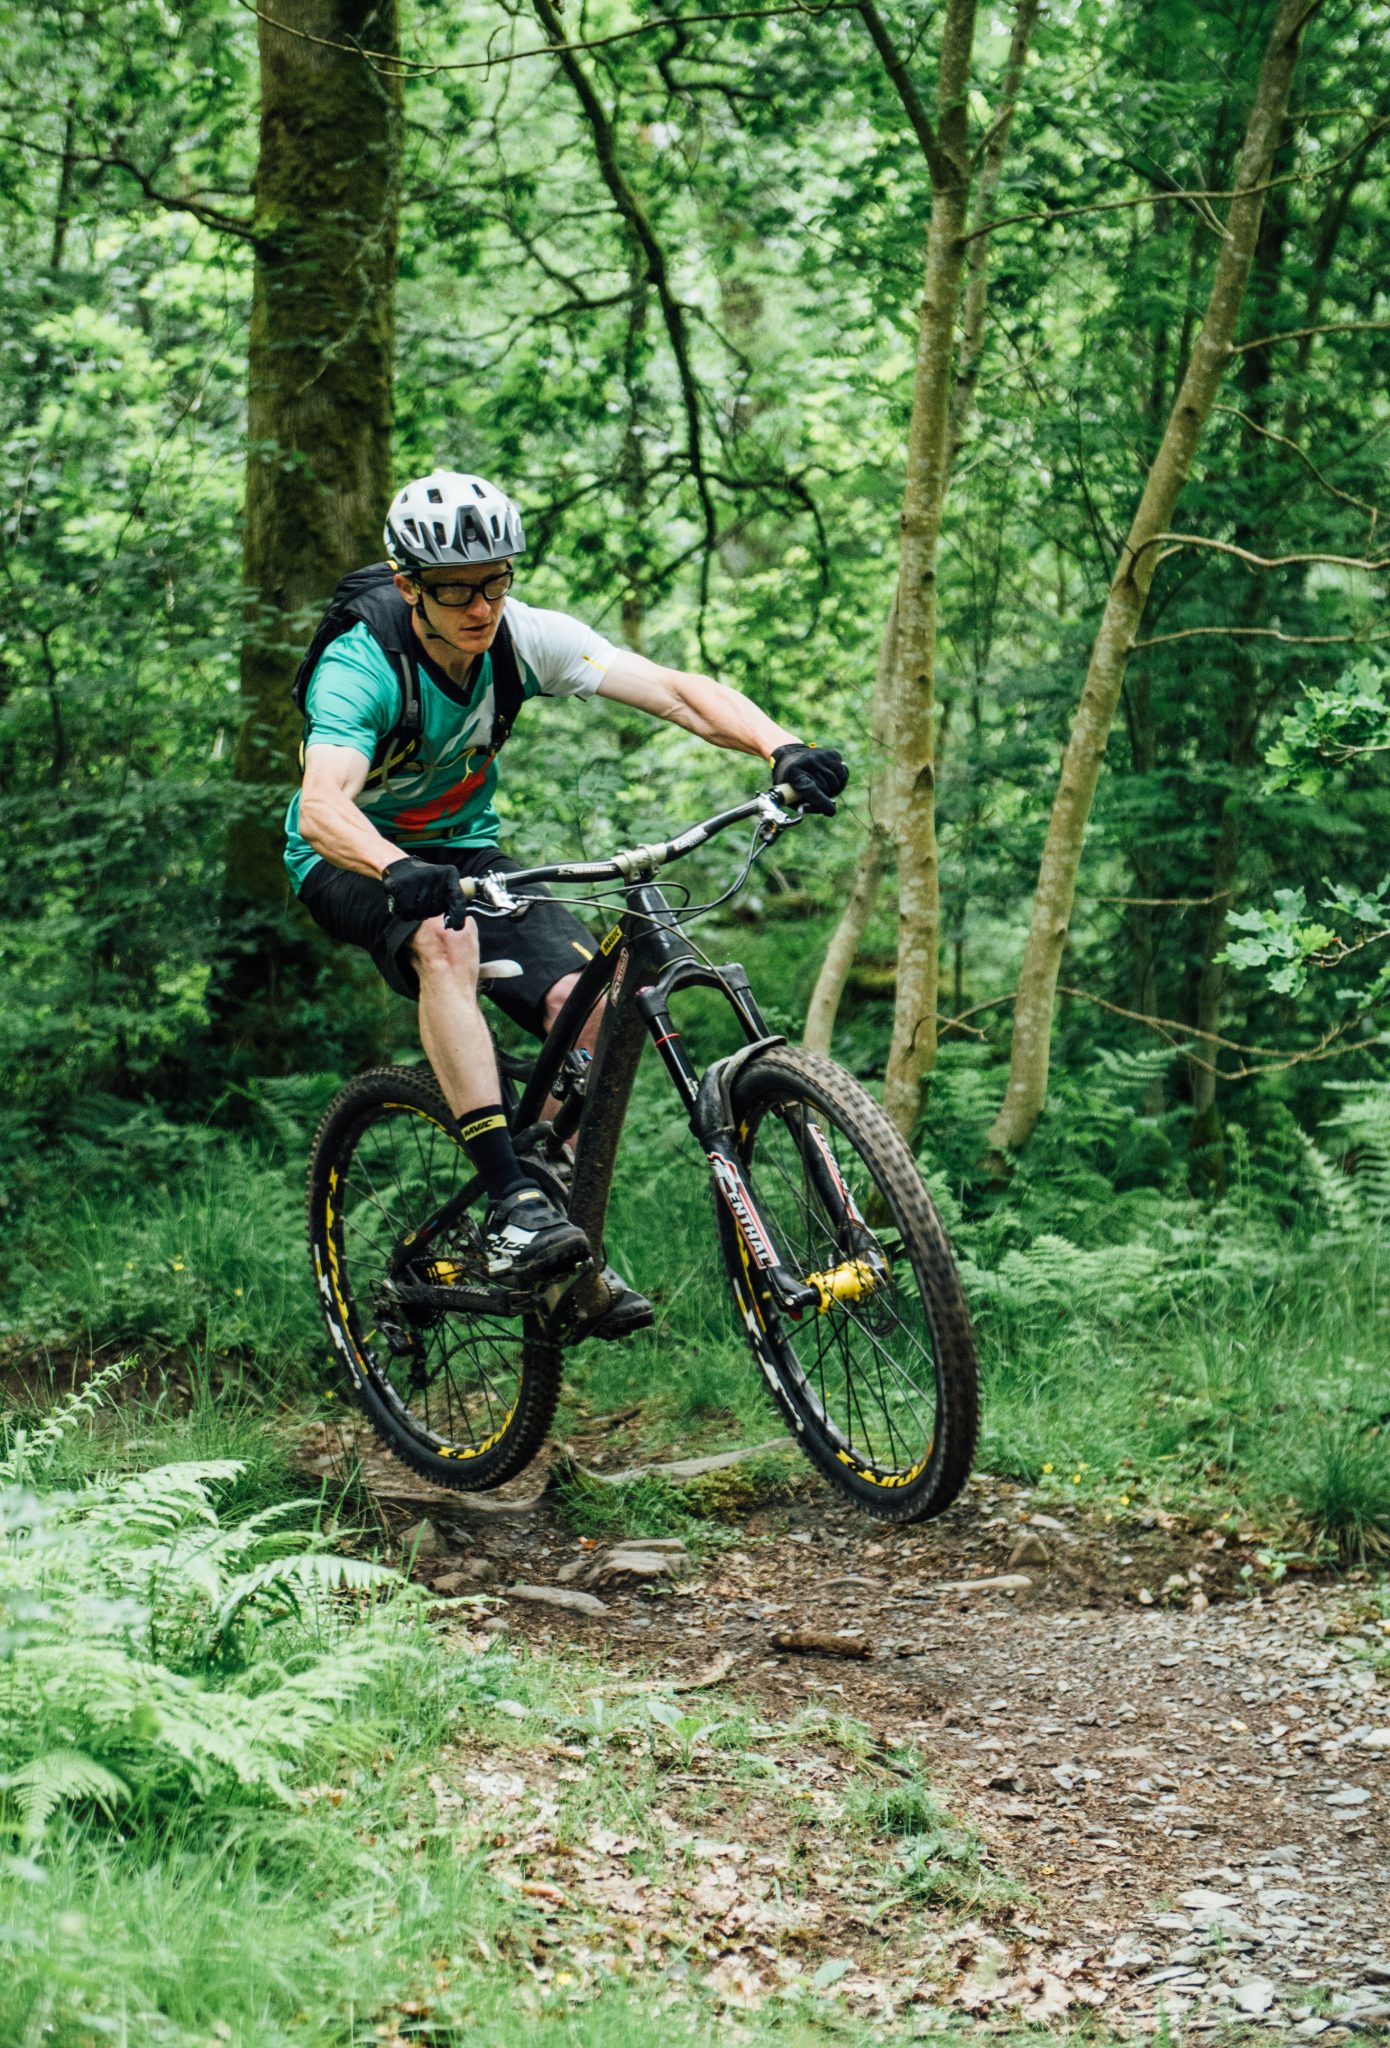
I’m a firm believer that the bike is the weight and not you (as per previous features), scratch that weight shift nonsense from your conscience and think about decelerating the bike (by pulling it into your body) and accelerating the bike out in front of you by thrusting the bar forwards away from you. The tell-tale sign that this is happening is the noise from the freehub. We also do this when cornering hard, punching off drops and taking to the air.
From coasting along (not peddling) standing tall and proud in your neutral stance (unless your at the extreme ends of the range of movement you can still decelerate and accelerate the bike below you) bring the bar towards you and seamlessly drive it forwards away from you. ALWAYS COVER THE BACK BRAKE AND BE READY TO USE IT TO PREVENT THE LOOP OUT. You can wind this up with a few decelerate and accelerate movements, think of the bike moving like a pendulum below you. Listen to the change in the noise from the freehub.
The legs and feet also come into play, moving at the knee is critical. Imagine you are sat on a bench but your feet are resting on a pair of skateboards (I used to skate street, and concrete parks, the similarities in moving a board are huge). If you wanted to roll them out from below you and ‘kick’ them across the car park how would you get them to go the furthest? By rolling them back first for maximum ‘wind up’ and ‘thrust’. So on the bike bring those legs into play to assist with decelerating and acceleration, this will give more drive or thrust.
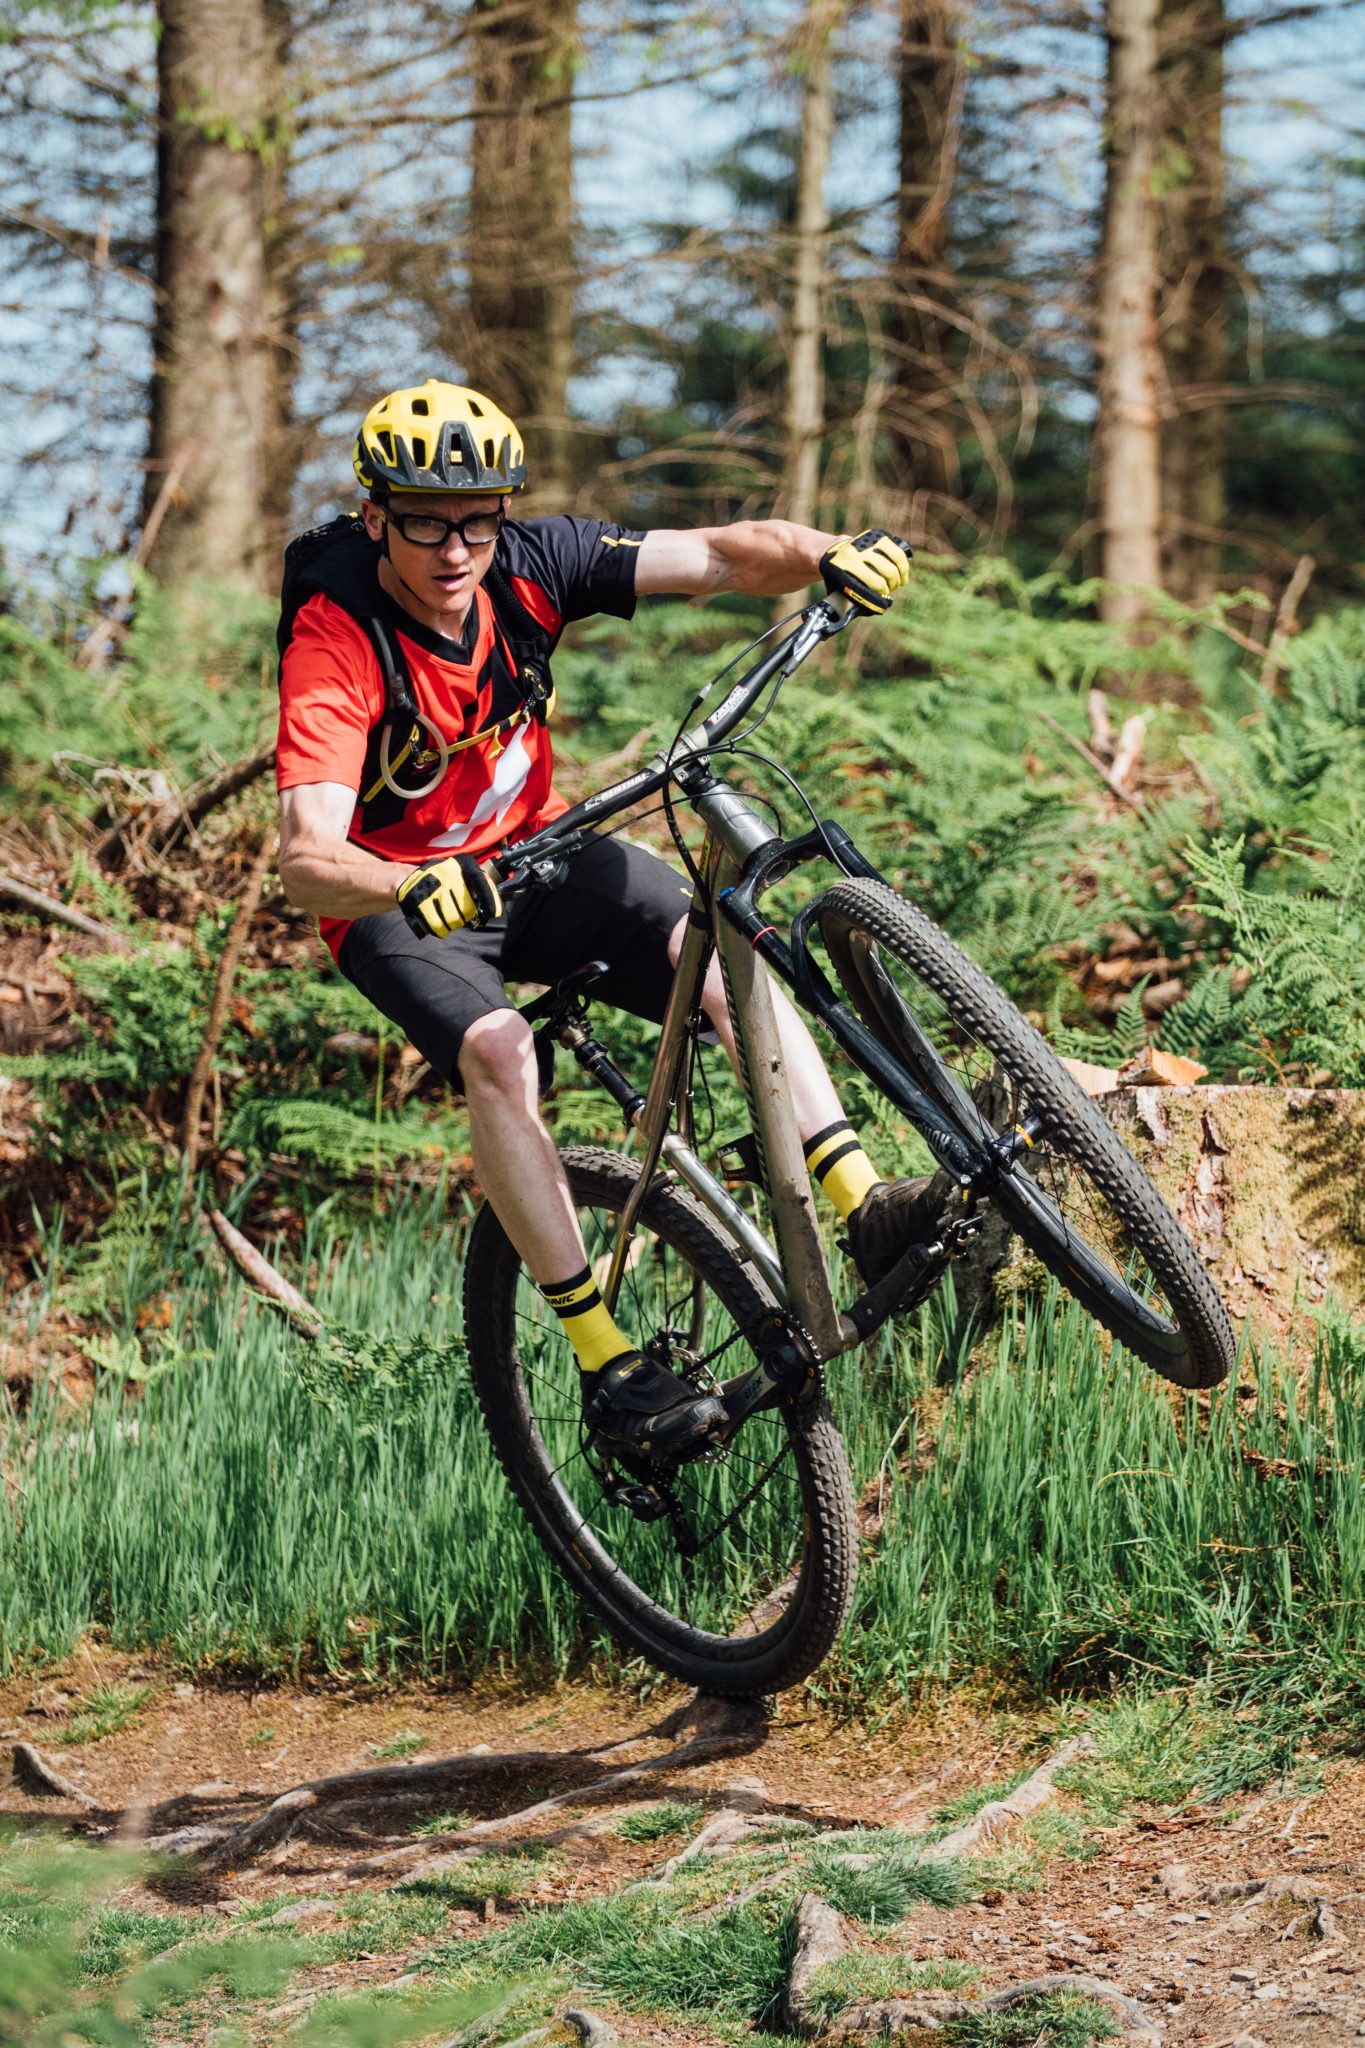
So here comes the inevitable, when you ‘strike’ and go for that manual the bike is accelerated out in front hard and fast, what happens when your body becomes at full stretch is it stops thanks to you gripping the bars. The sudden stop should seamlessly be combined with you following the shape the bike wants to take. Pulling back and up on the bar while kicking the legs below to drive the crankset and back wheel under the bar that is now arcing back and upwards.
Now through this part of the song and dance, it could go either one of two ways. If the torso remains static, then the bar is rotating up, and towards you, the elbows may bend outwards and/, or you will raise the hand above the head pivoting from the shoulders as if you are kneeling to pray. The result is a loss of lift and in the prayer matt to mecca scenario the ability to see up the trail.
The central torso pivot needs to come from the hips ‘lifting’ by not using the biceps or radically changing the angle between outstretched arms and torso but by relying on the whole torso to fall backwards from the hips with arms straight at a relatively consistent angle to the torso. Remember that you are pivoting around axles, rear wheel and pedal. When we are pulling back on the bar, it is done with straight arms through a fingertip grip and stretch the same as when we hold a wheelie. If you bend the elbow, you merely lift the handlebar to the chest, and a significant portion of your weight (head, chest etc.) remains in front of the pivot point (rear axle) which inhibits the lift.
Just think falling backwards with outstretched arms. Visualise a comedy fall where someone falls back and waves their arms in a poor attempt to counterbalance that fall. The wavy comedy hand has the hook of the thumb under the handlebar lifting upwards supporting the bar from underneath while the shoulders fall backwards (in our case over the rear wheel).
This is where the ‘weight shift’ lingo is derived. The action of the torso moving by falling back (your bodies weight ‘shifting’) is the back end of the job, this is just too late in the whole picture to become the focus of your efforts, to overexert/exaggerate at this point is to recover a mistake made from the outset. Think powerlifters moving massive weights.
Like all jobs (especially manual labour where the consequences for poor planning results in burning additional energy) the setup and initiation of the movement are, and this comes down to the dynamic thrust of accelerating the bike out in front. This is where we cross the grey scale, and Street Manuals become Trail Manuals.
On the trail we often don’t have time to deal with such a slow wind up to get the front wheel up, we need it in the air in an instant then back on the deck to brake and steer and then almost instantaneously back in the air to eliminate the next stall. If you're ticking off white lines in the street its a different matter.
So when we go from a slower longer more laboured SM to a snappier TM, we use less exaggerated shapes. The flick of the heel stomping down and pushing forward is almost unnoticeable, yet the height you can lift the front wheel up to (the opening of a good bunny hop) can be greater in a shorter distance than with an SM.
Please take note that WE ARE NOT wanting to bounce up from compressing the fork on a suspended mountain bike. BMX riders still manual with nowt to bounce! The danger of compressing the fork is adding to any stall, think of where the energy travels in that scenario - down - back up and not forwards. However, the ‘tap n go’ touch down compression and release of the fork, and front wheel skipping along the rocks does mean that we do use rebound to assist with lifts and our timing has to be trained to perfection to work with the added dynamic that suspension brings to the dance.
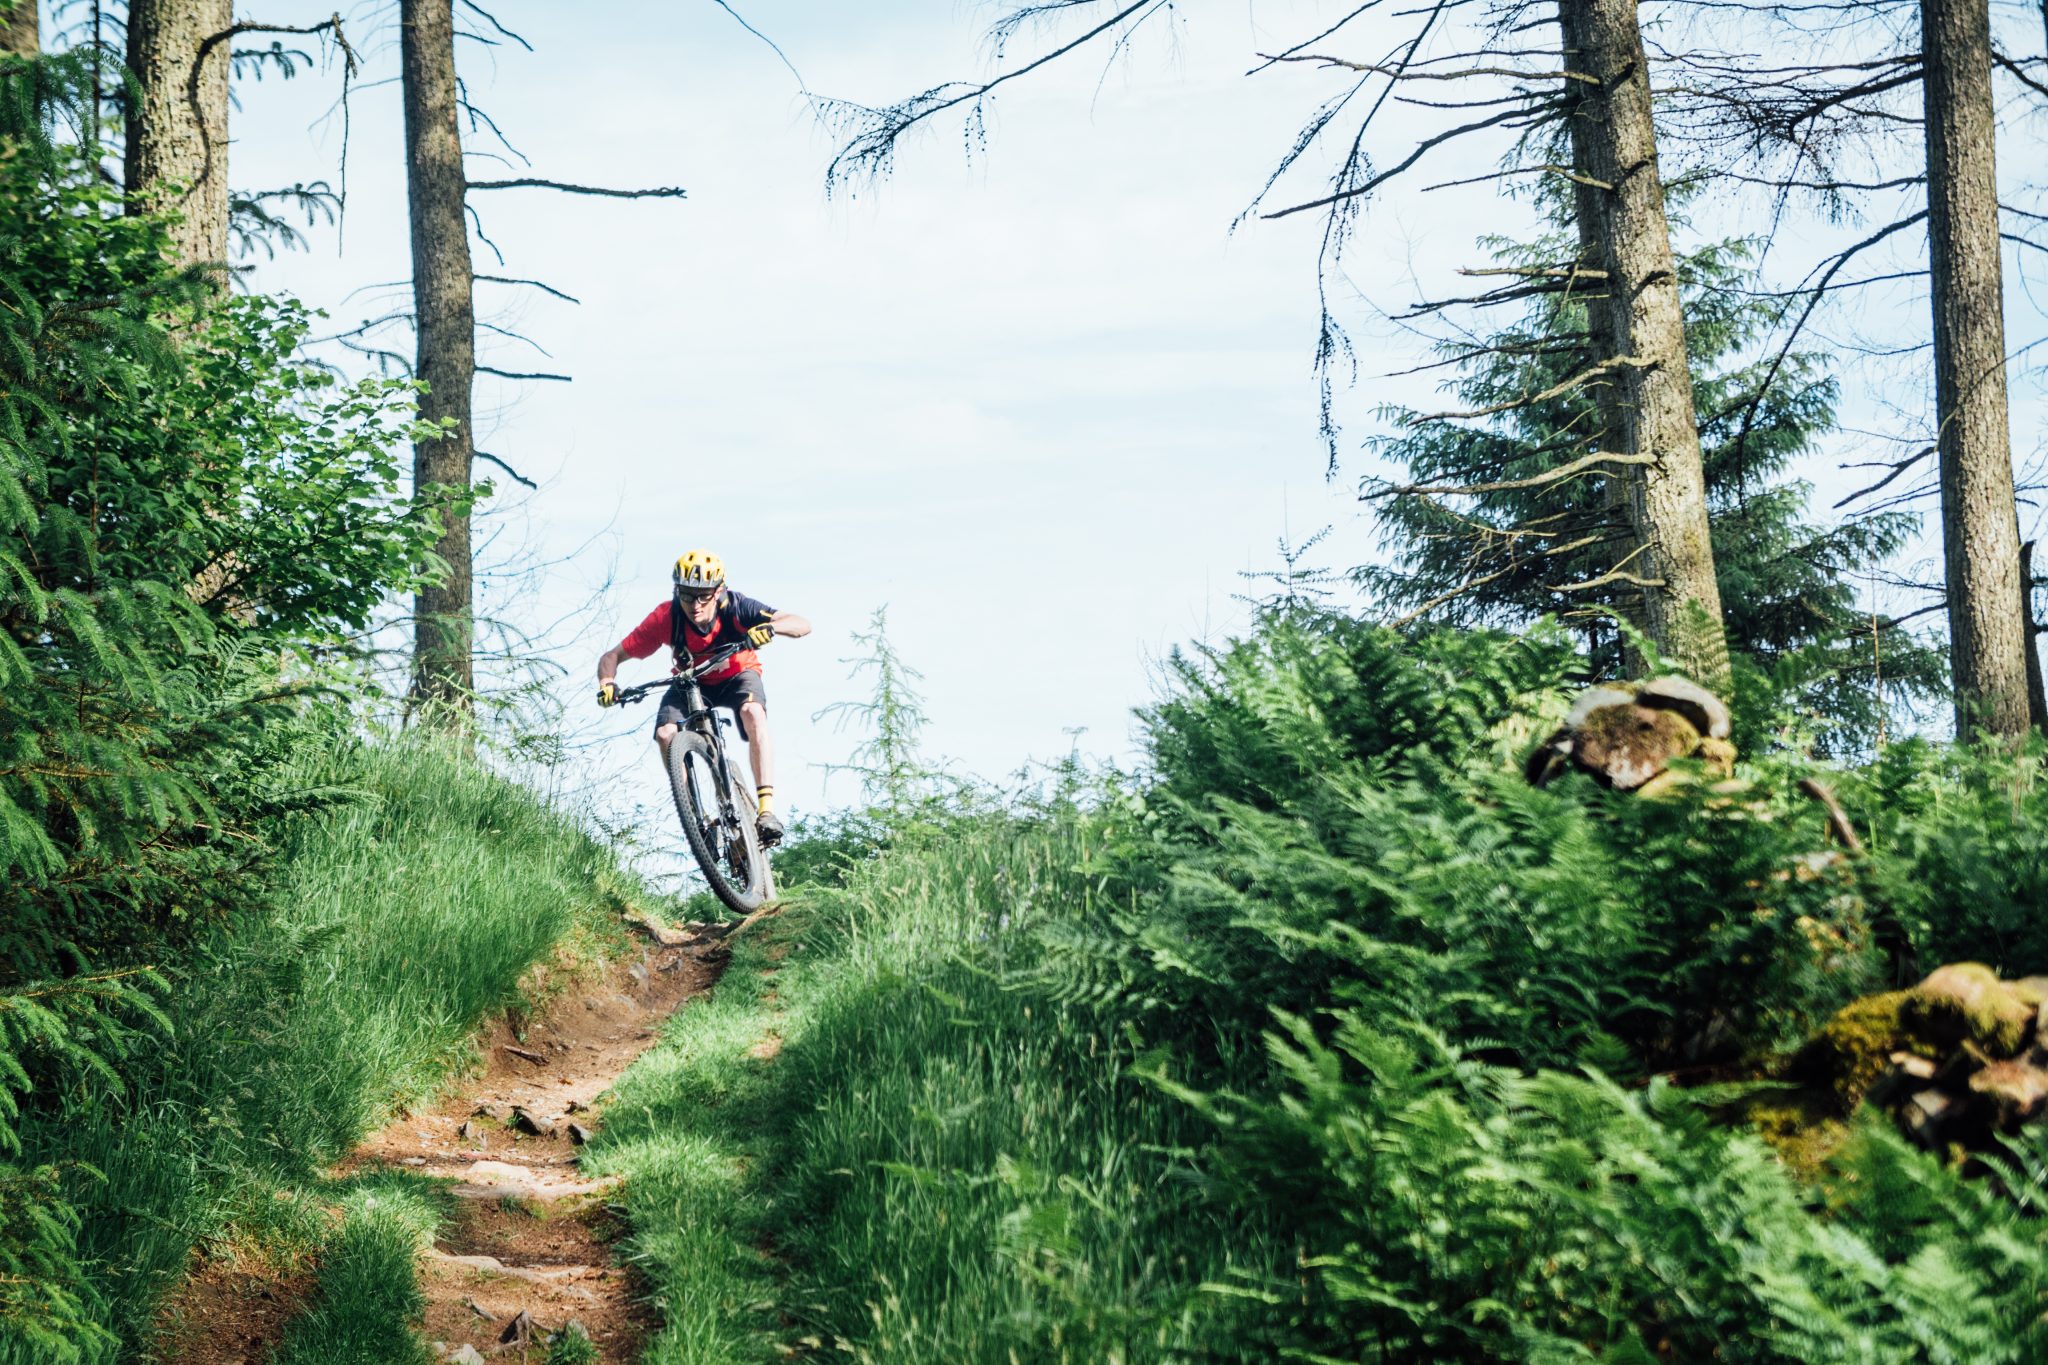
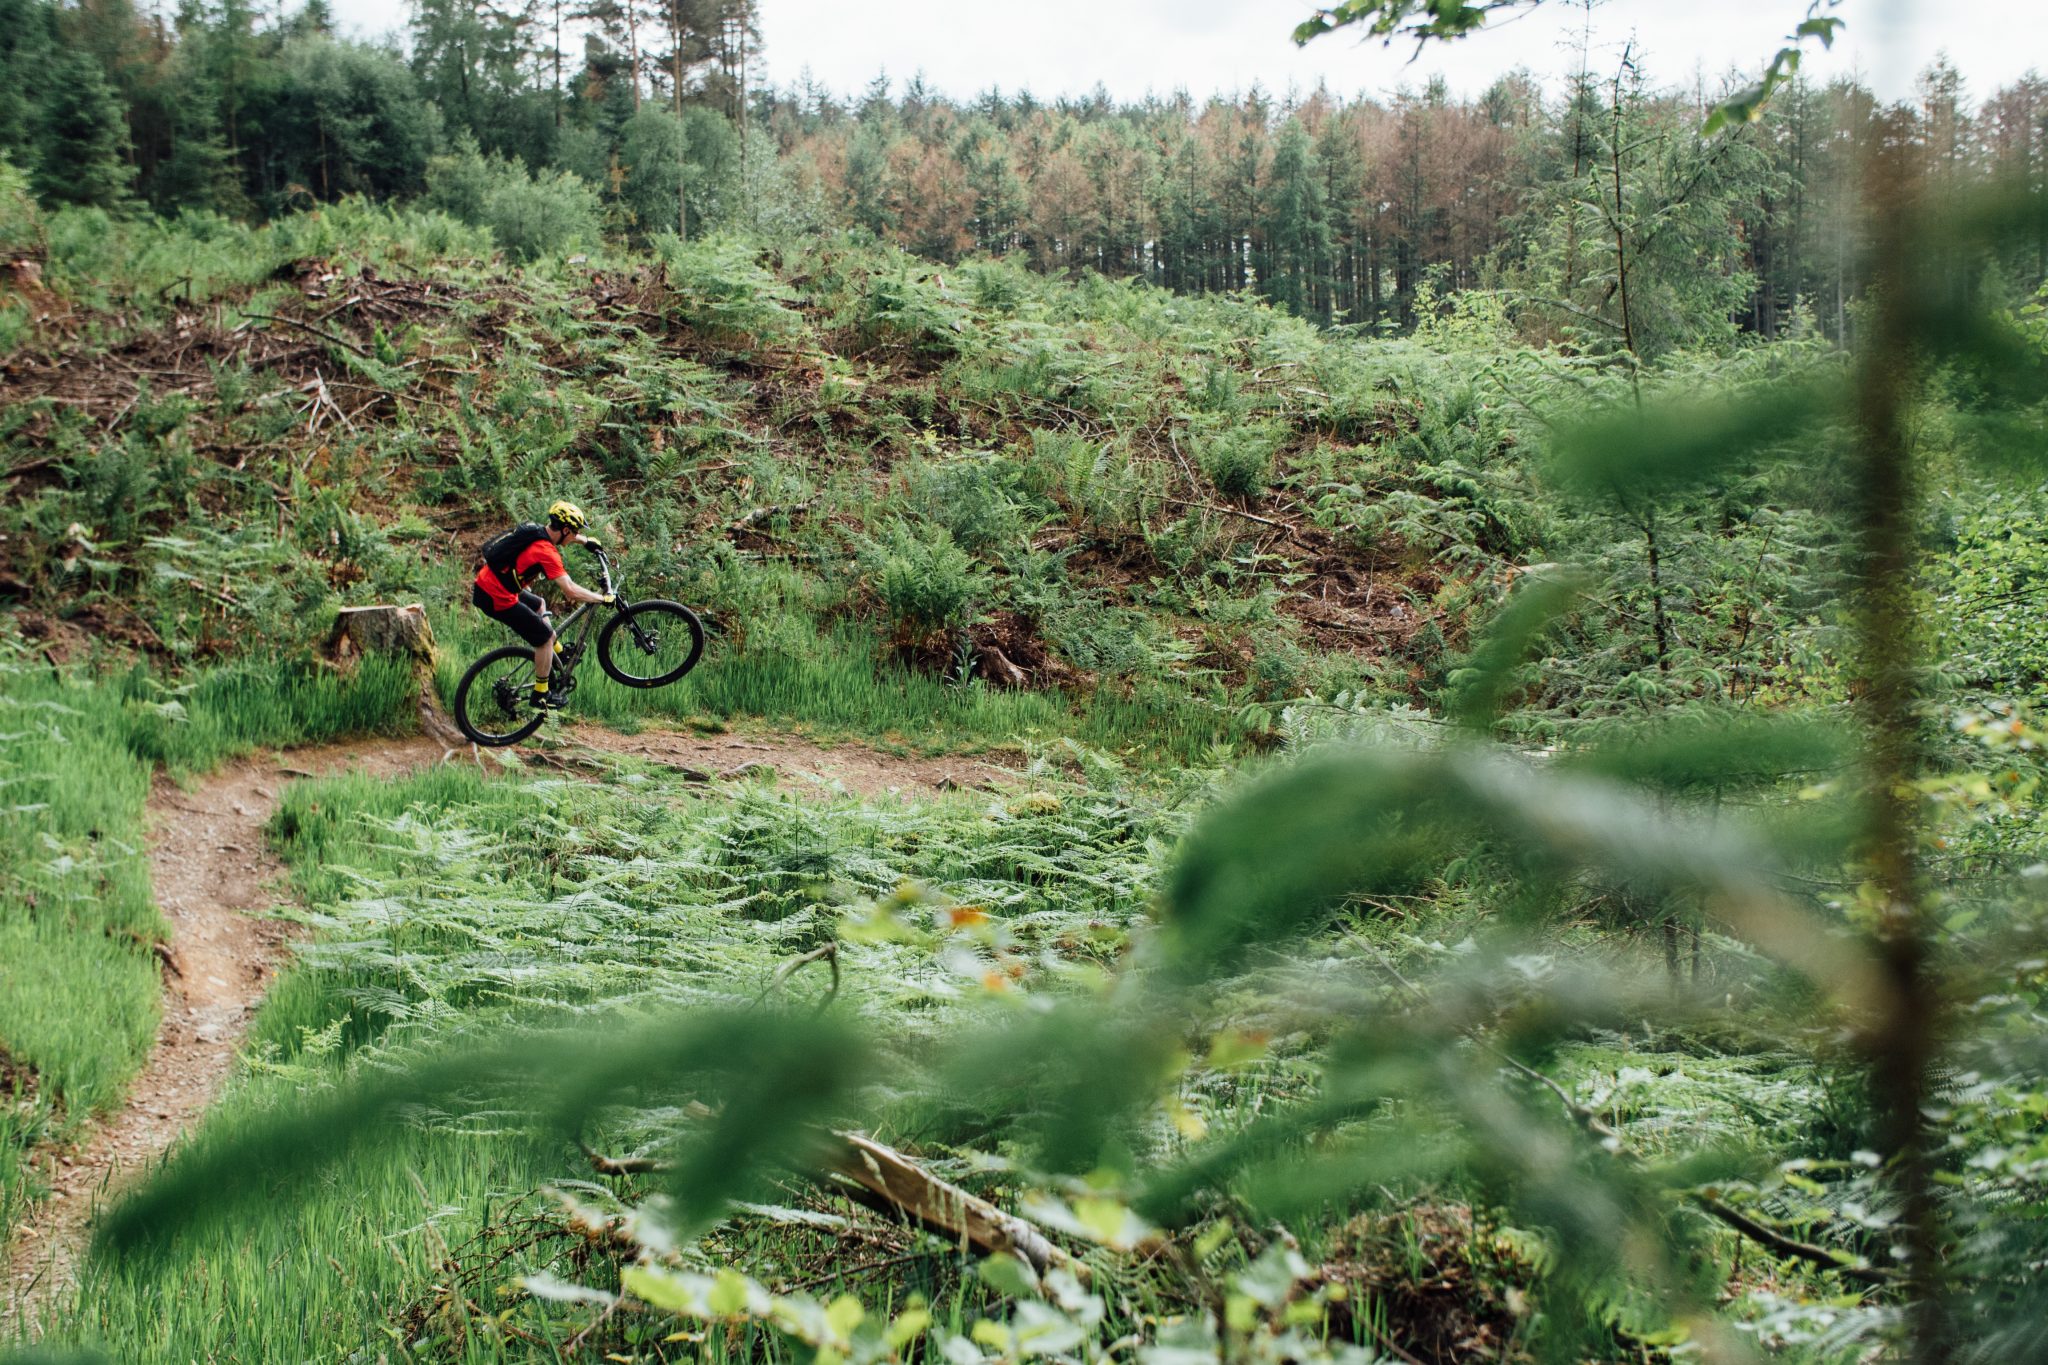
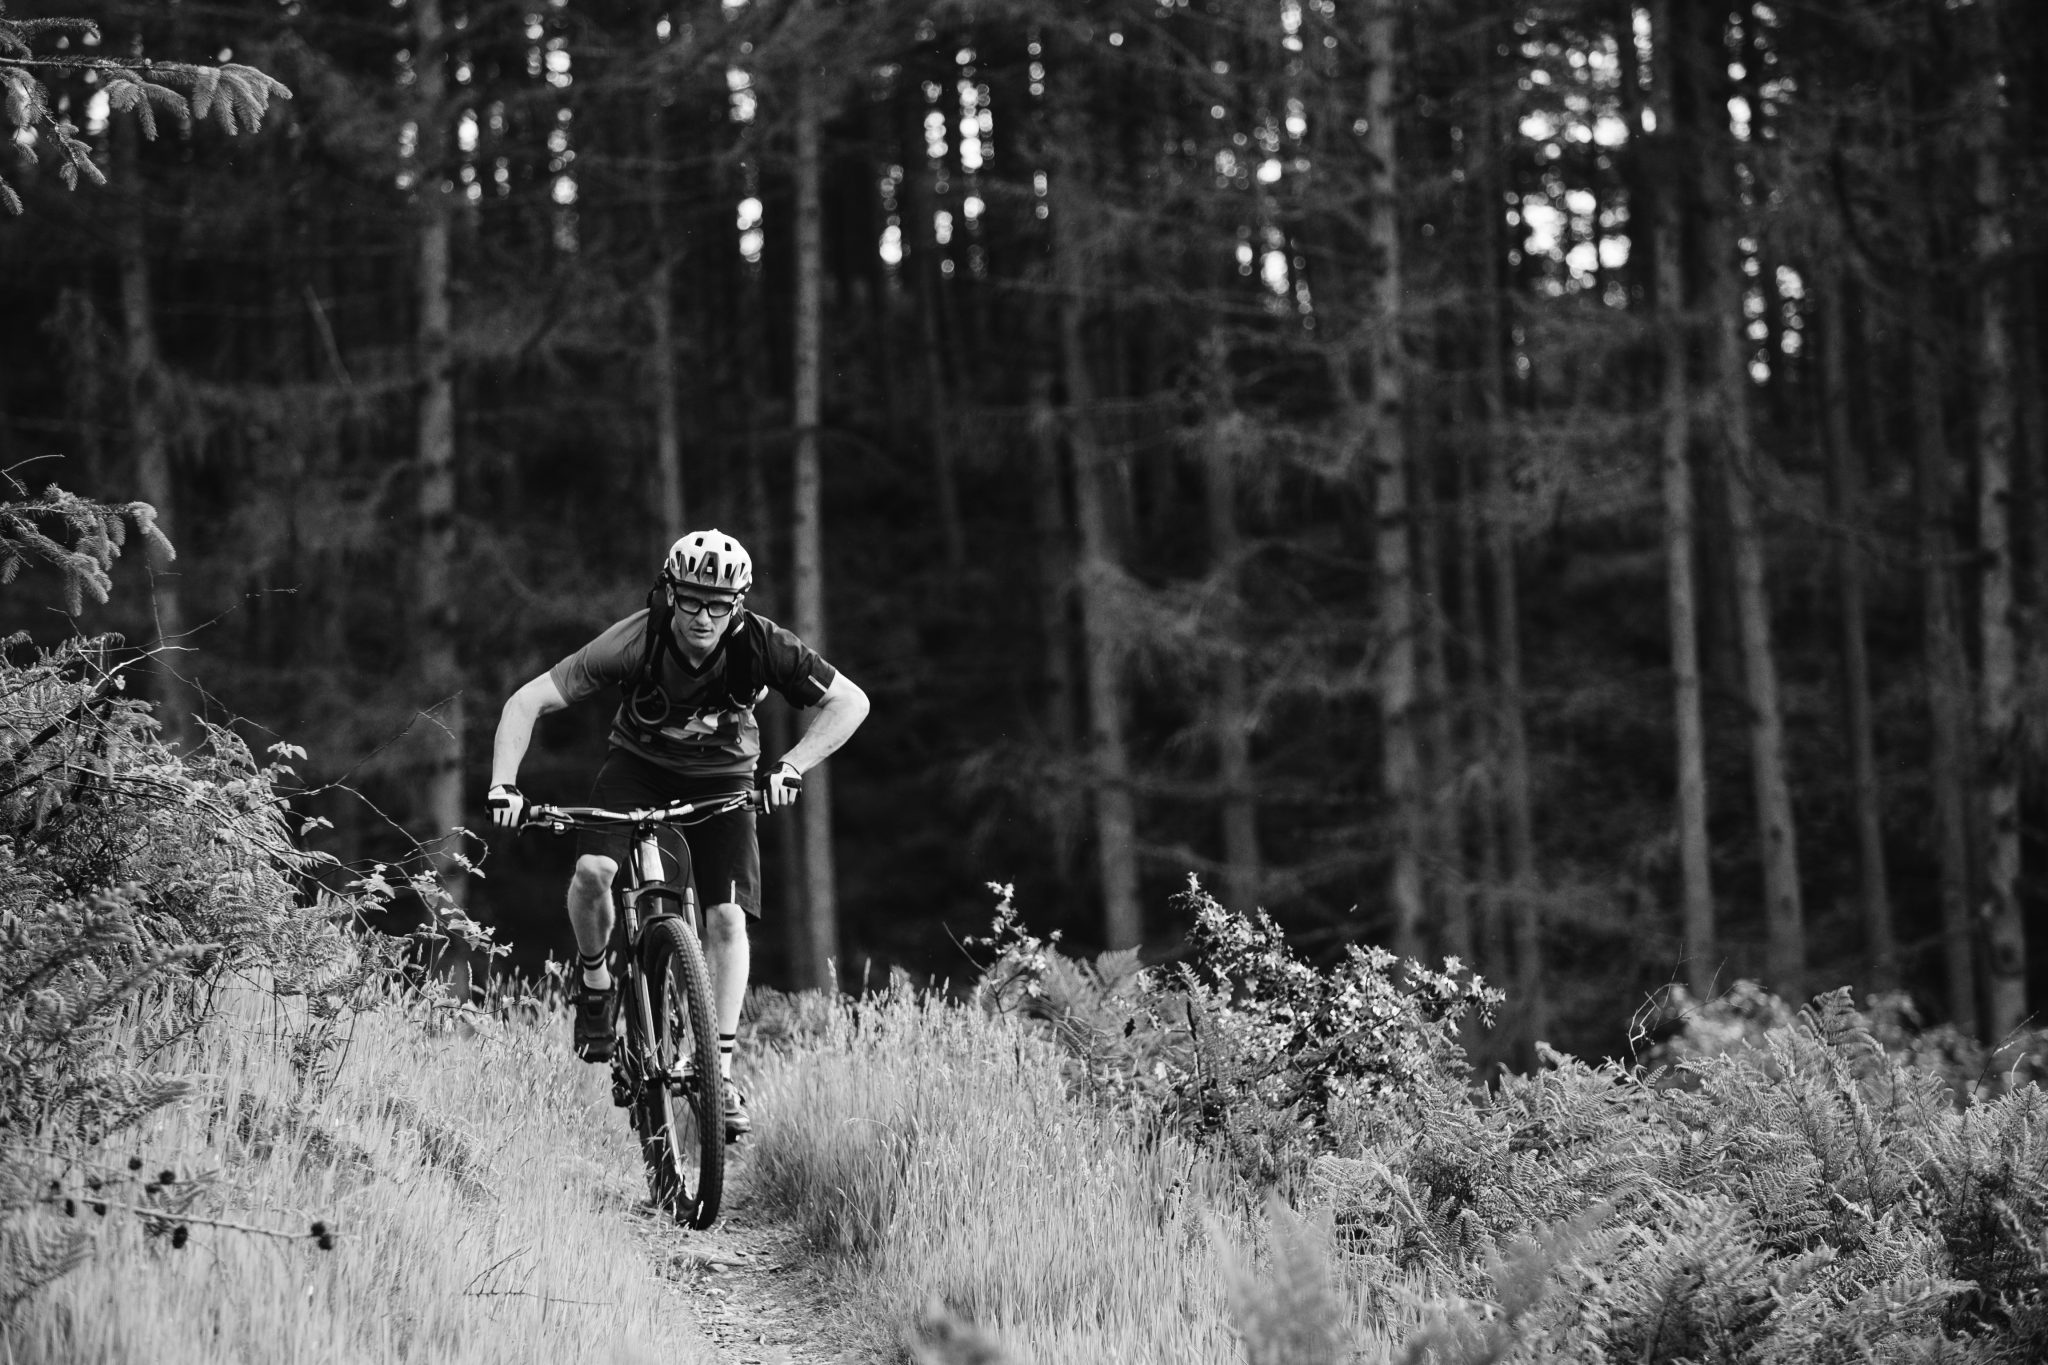
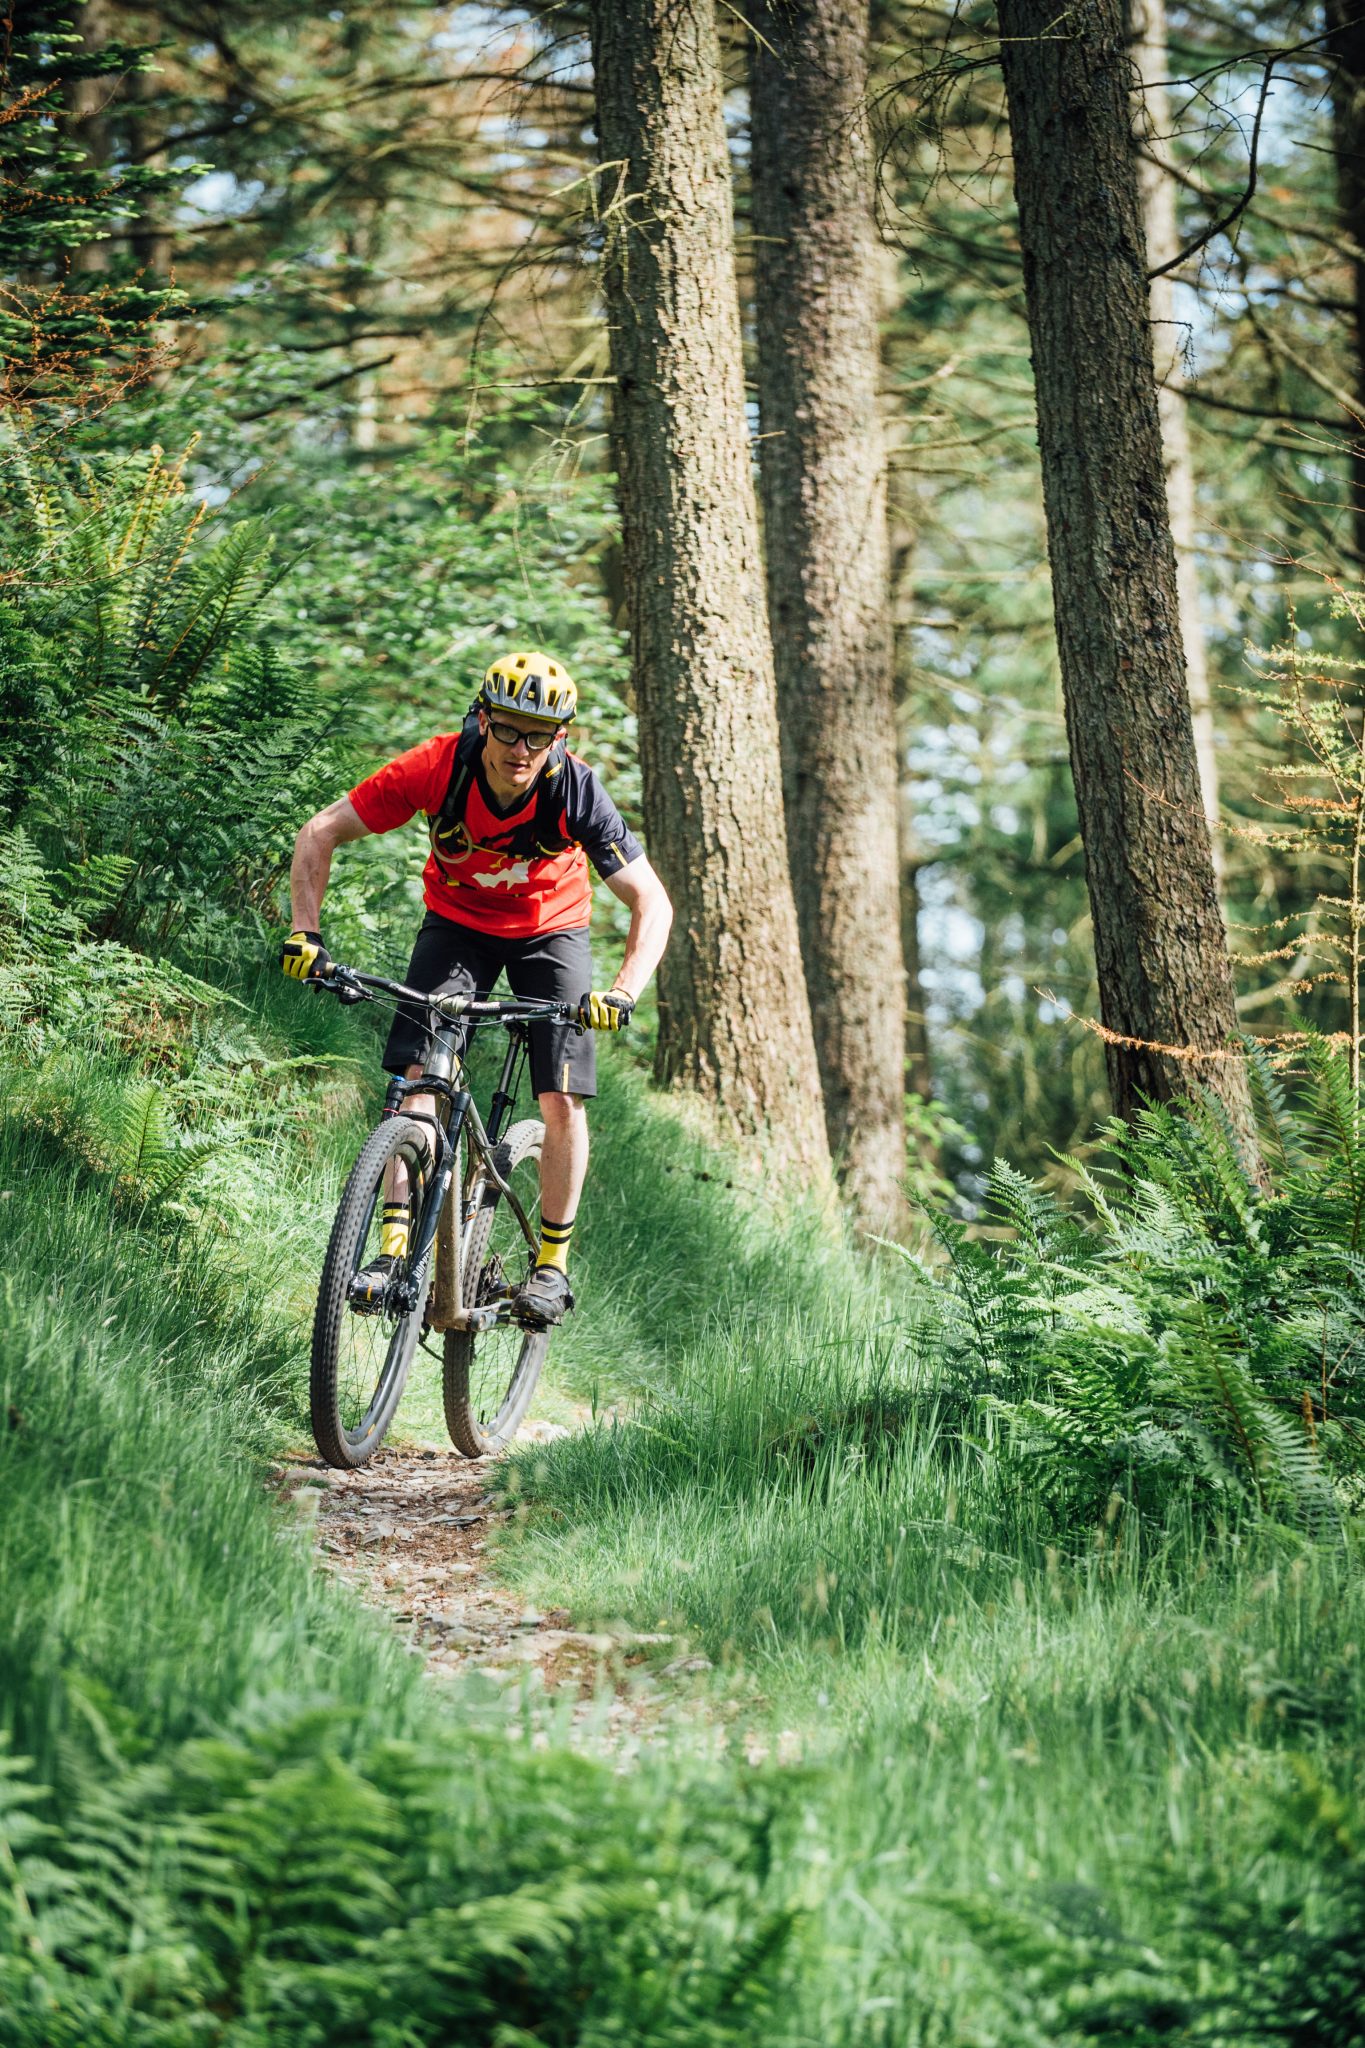
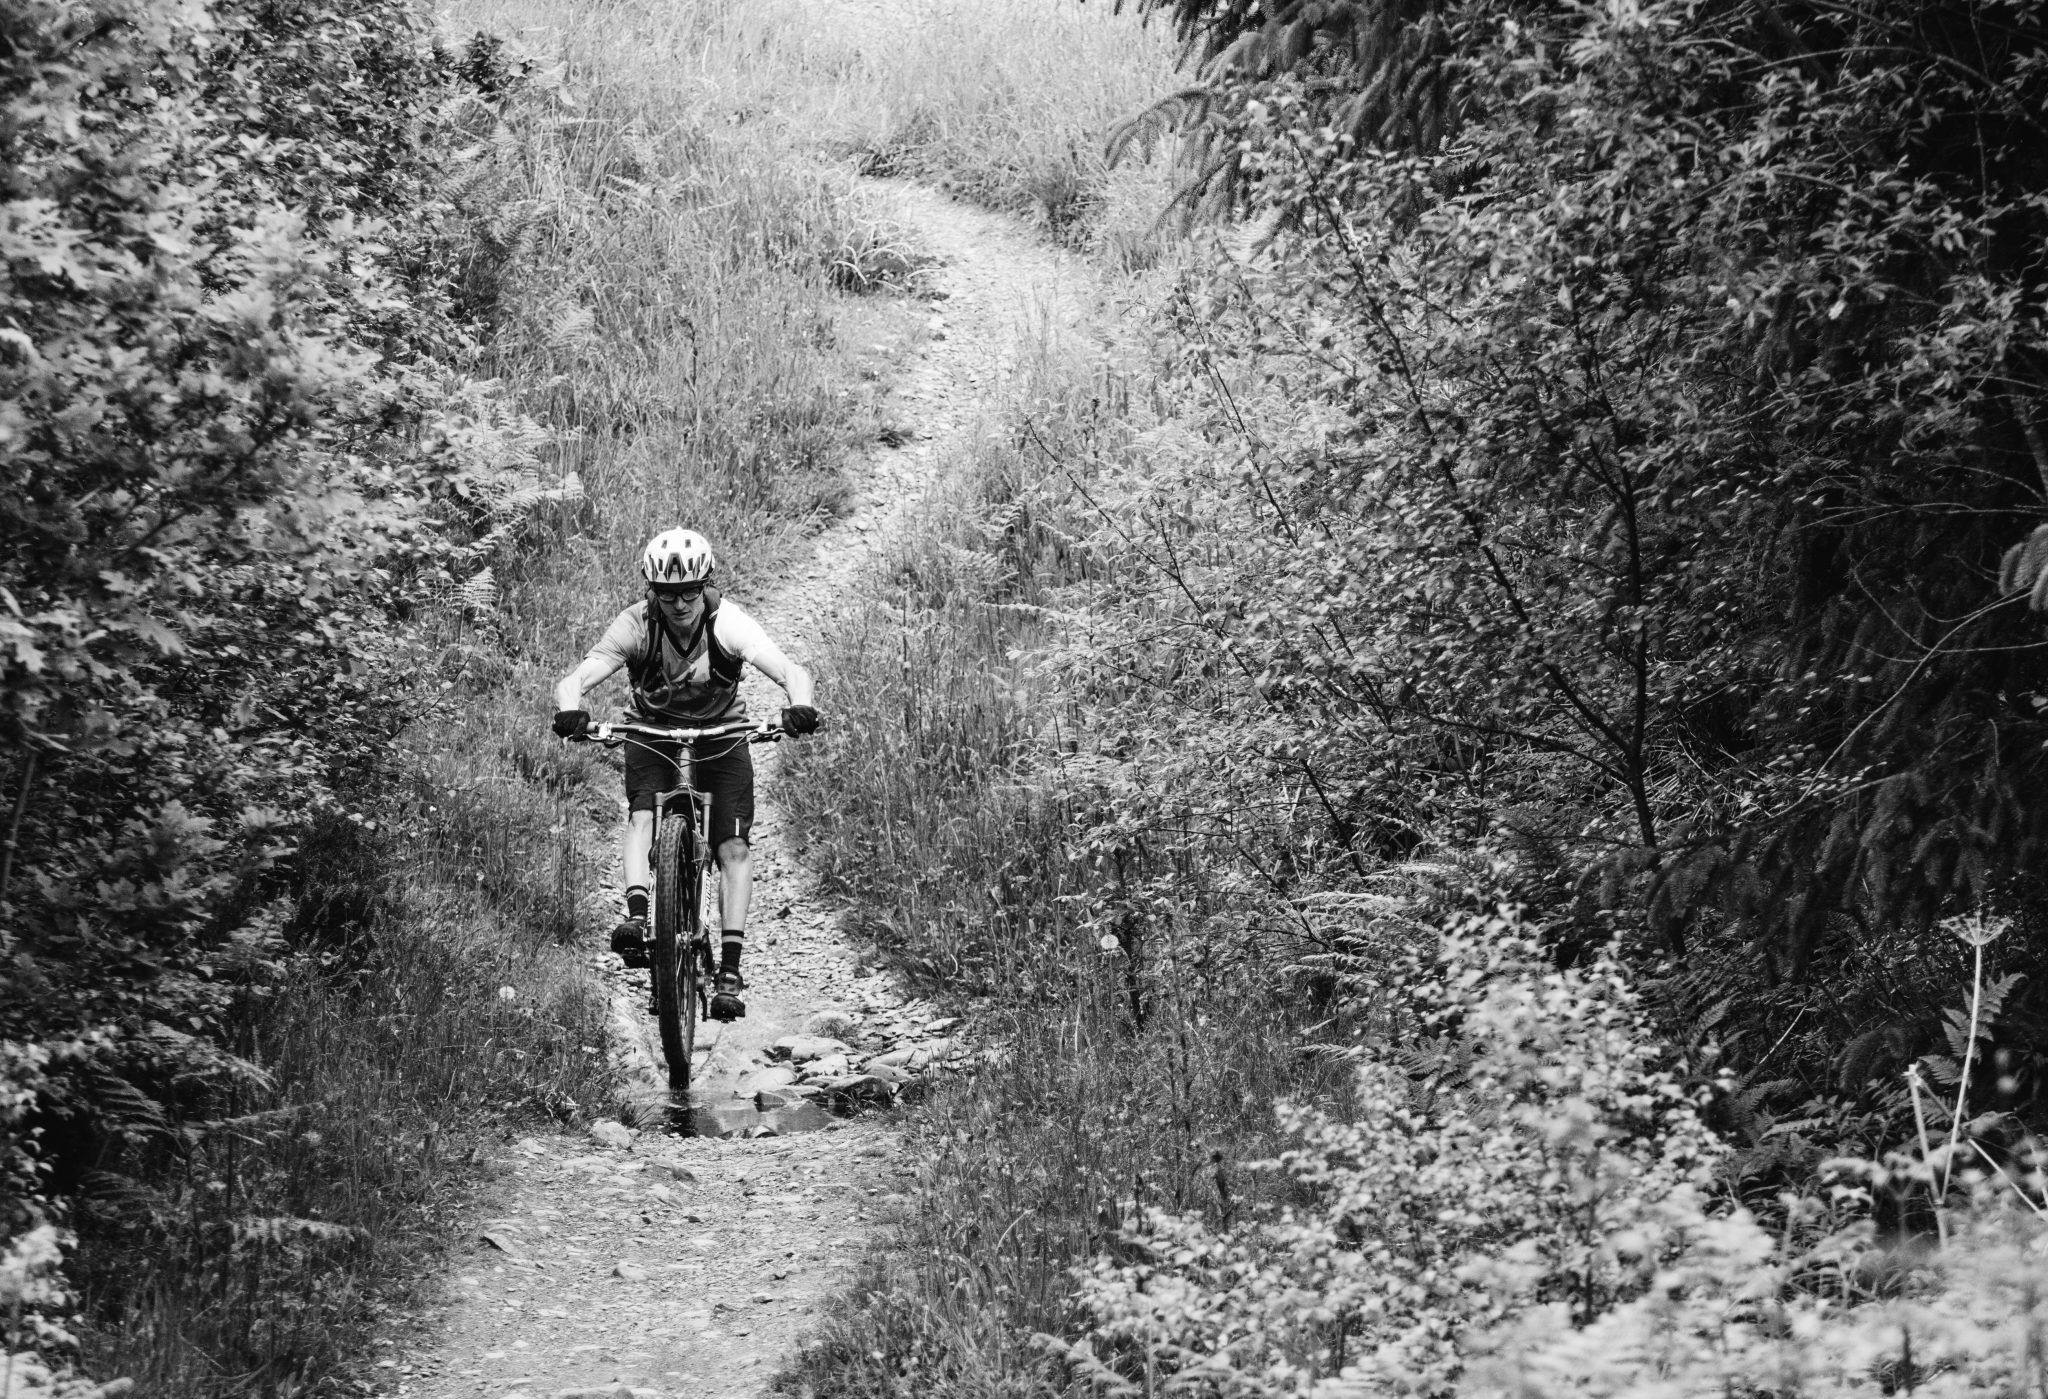
It was through setting up photo sequences using a fixed point in the background (one of the two trees seen in the images) [PLEASE INSERT AT LEAST TWO IMAGES FROM A SEQUENCE HERE TO HELP THIS MAKE SENSE] to watch the head stays relatively still between frames while bike is decelerated and accelerated below that the discovery was made. I had to try and time each manual so everything would line up on camera. The amount of ground covered to clear my marker would wax and wain run after run as we tried to get lined up for the lens. Applied basic scientific principles were already being used, same start point every time, rolling down the gradient to set the speed to hopefully capture the sequence. My cue to perform was initially virtual, and the timing was all over when we finally placed a more sizeable branch for me to pop my front wheel over it was noted that the timings dramatically shifted.
Puzzled why I could not perform like a metronomic robot and initiate my manual at the same time every time Daniel Son and I swapped out. He has a very distinctive street trials style, and it was immediately apparent that the SM style is not needed in rocky gnar and root strewn steep hillsides and that I the old school analogue child was short-circuiting between modes when it came to launch time. Grey matter fried and it was time to turn launching into lunching.
Following a huge lunch and debate down in the Mabie House Hotel we concluded and created the two distinct styles of manual for you to play with.
Those with more XC orientated setups should air towards contentment and security of being postured sweet and not hyperextending by focusing on snappy sweet smooth yet small manual lifts - aka Trail Manuals. While those of you riding slacker, higher bikes (street, all mountain/enduro, jump, freeride, DH) may wish to take on the additional Street Manual style linked to the ultimate trail riders snappy fast style Trail Manual.
Study the snaps, watch the video (multiple times) and get out there and give um a go. Master this and your one move closer to next editions skill; the Bunny Hop.
As they say in Llandow, ciao for now.
This technique article was in Issue 54 of IMB.
Related


By Clive Forth
Clive Forth is a rider who has been there, done that, got the t-shirt and cleaned his bike with it. He has grown with the UK scene and technological developments for the last 30 years and has competed at all levels in all disciplines riding for some prestigious brands along the way. Always looking for that extra edge with endless passion and drive he is geared up to bring you the inside line on all aspects of mountain biking skills and technique.